
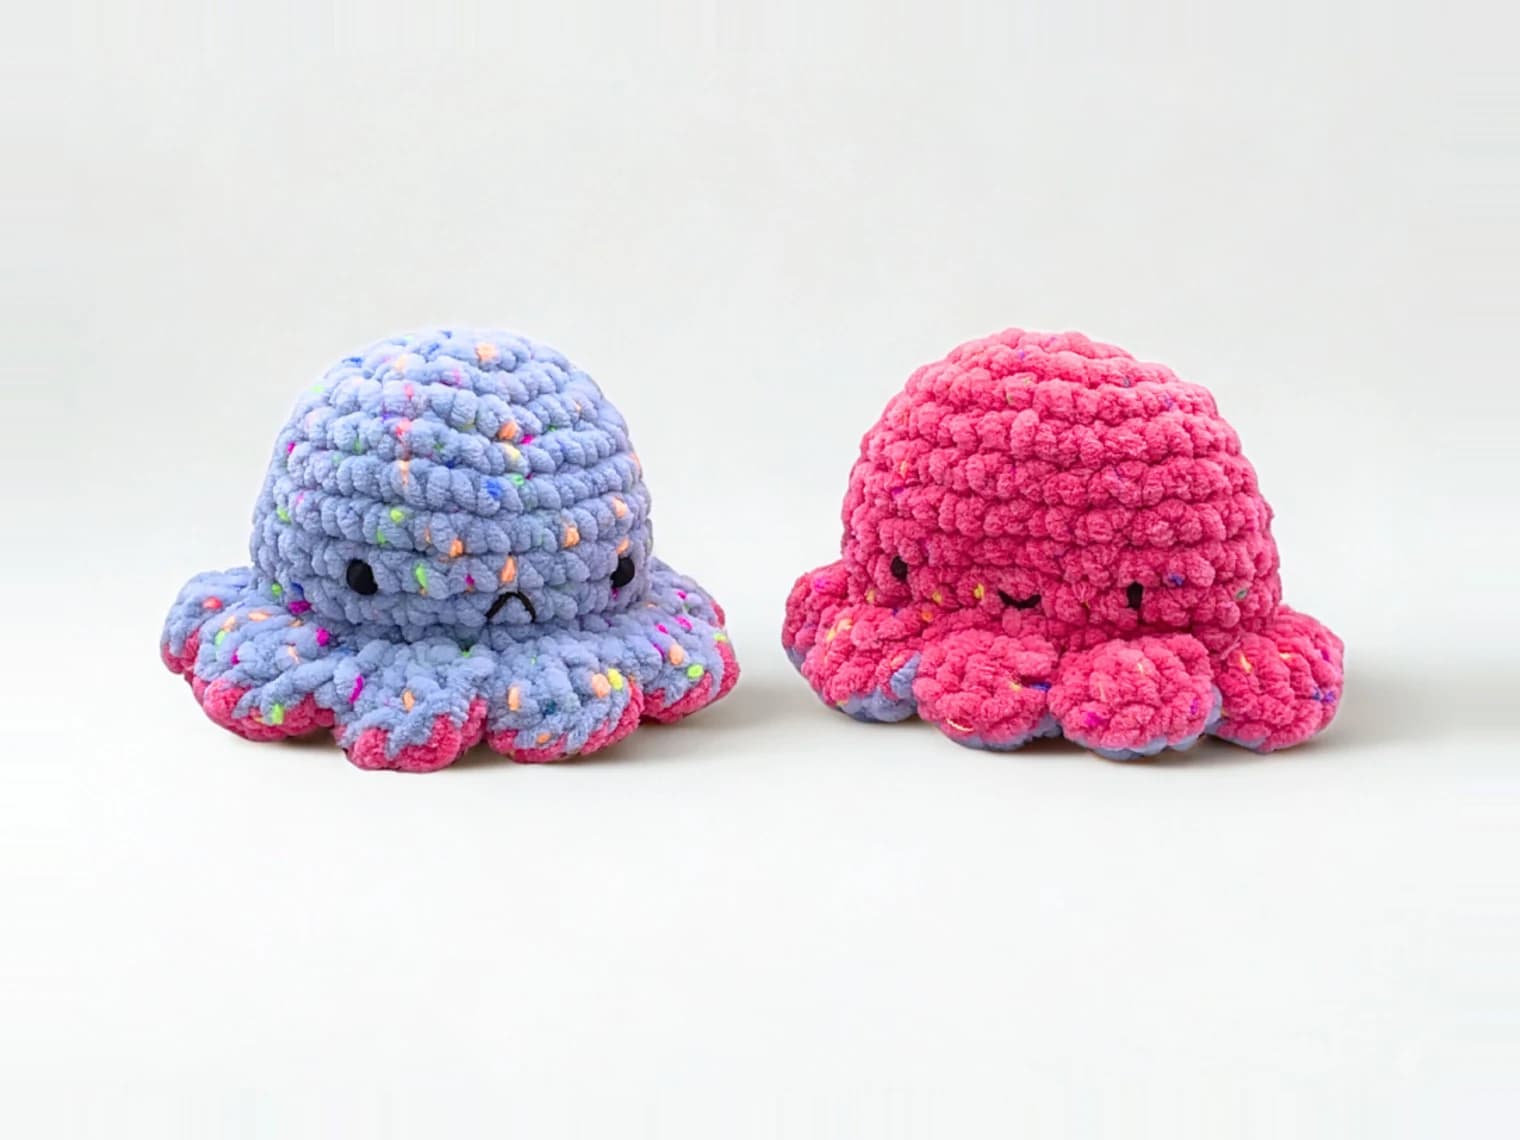
Free crochet pattern
Reversible mood octopus
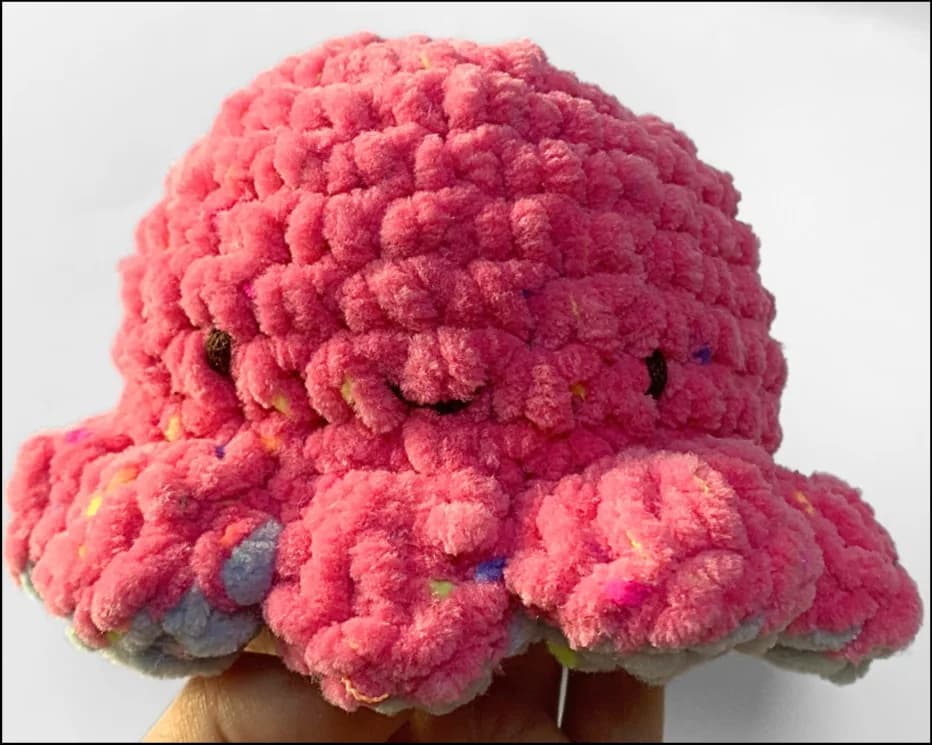
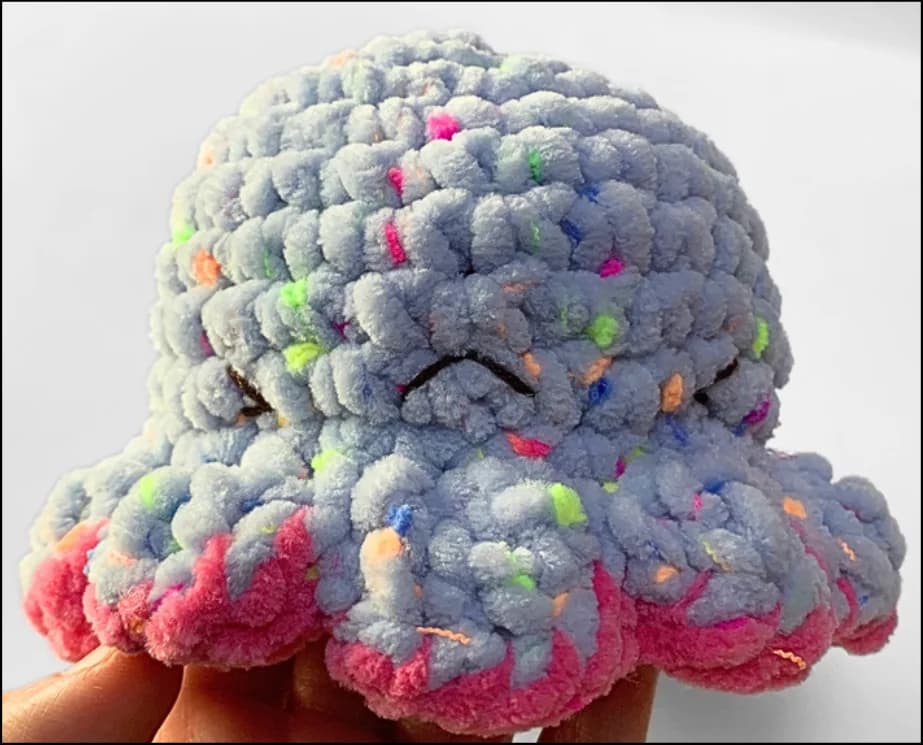
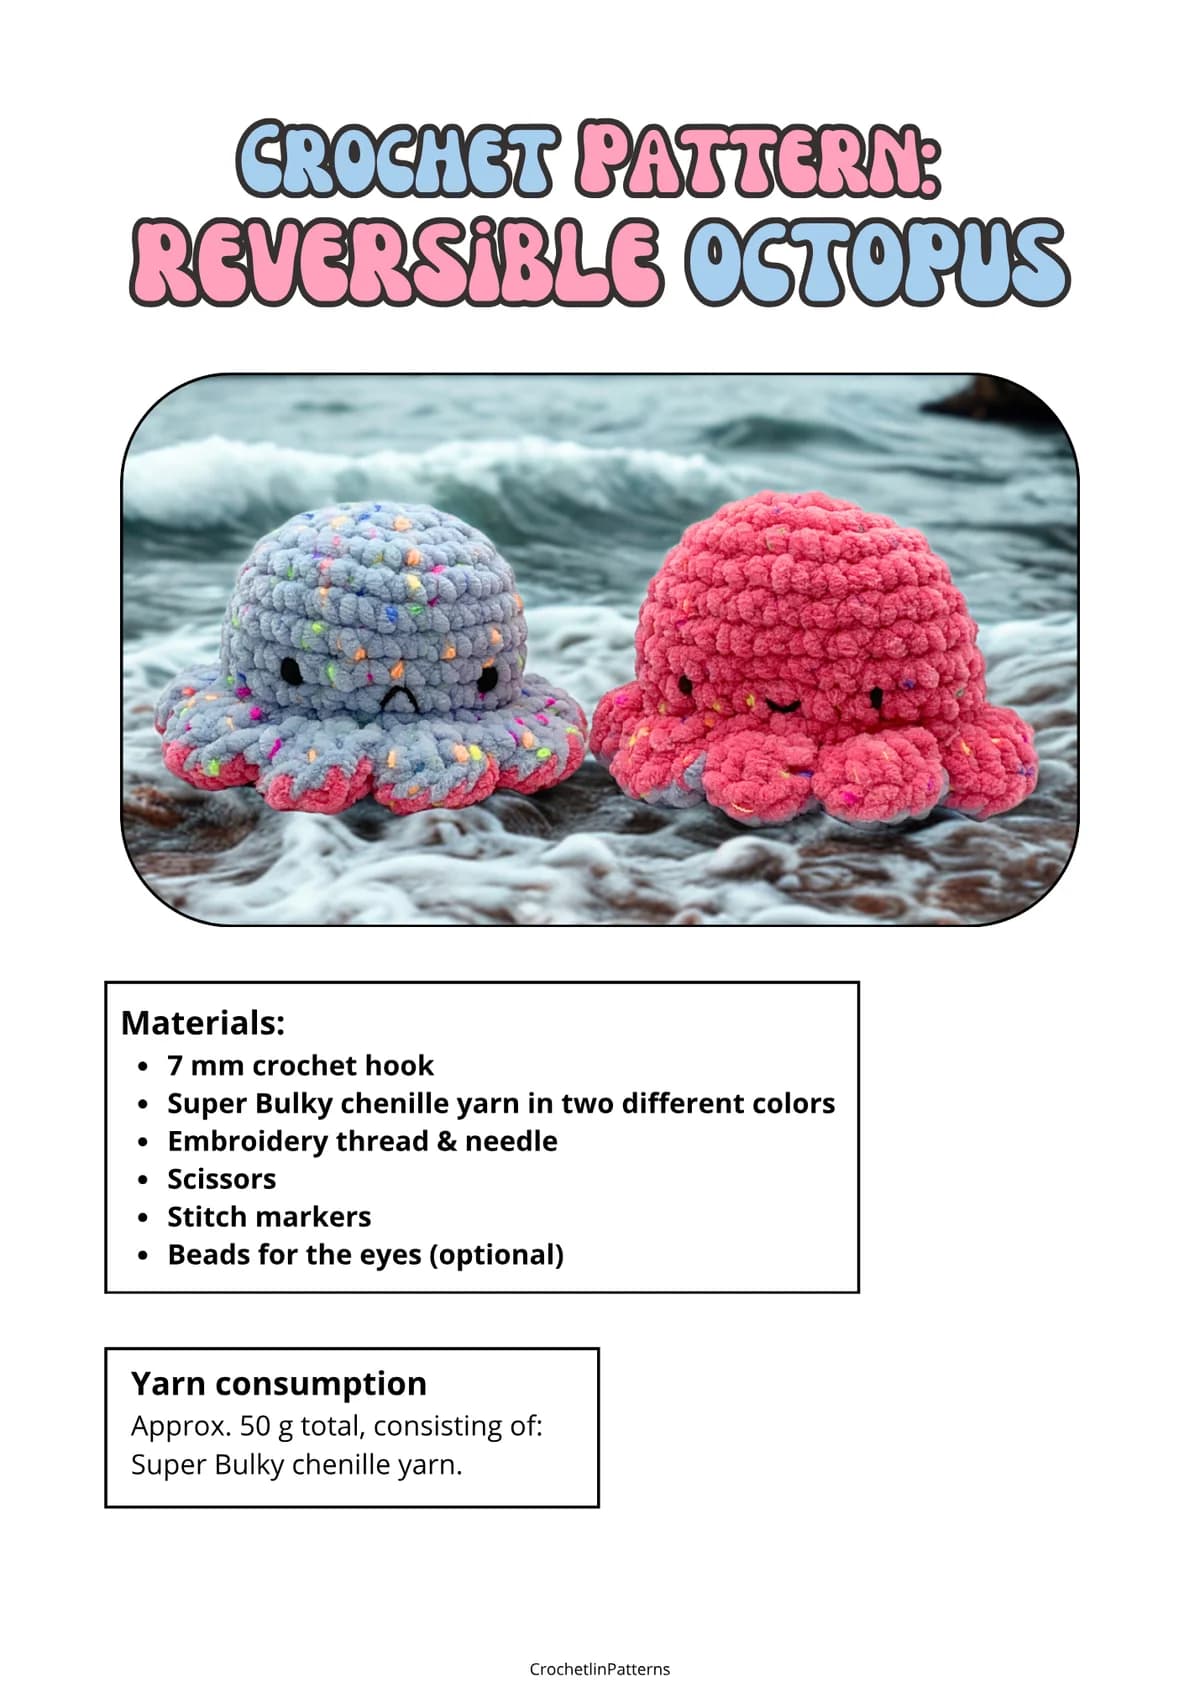
Happy on one side, grumpy on the other. The octopus is worked as two pieces, sewn together tentacle to tentacle, and then you turn it inside out depending on your mood. It is made in super bulky chenille yarn, so it grows quickly and ends up lovely to hold.
The whole pattern is written out on this page, word for word and with every step-by-step photo, exactly as it reads in the PDF. If you want the PDF to print or keep on your phone, I will send it to your inbox further down.
- Level
- Beginner
- Hook
- 7 mm
- Yarn
- Approx. 50 g
- 13 pages
Materials
- 7 mm crochet hook
- Super Bulky chenille yarn in two different colors
- Embroidery thread & needle
- Scissors
- Stitch markers
- Beads for the eyes (optional)
Abbreviations
- ch
- chain
- sc
- single crochet
- dc
- double crochet
- sl st
- slip stitch
- st(s)
- stitch(es)
- [ ... ]
- used for repeats
- sc inc
- Increase. This means working 2 single crochet in one stitch.
- sc dec
- Single Crochet Decrease. A single crochet decrease means combining two single crochet stitches into one.
The pattern
Word for word from the PDF, with the same step-by-step photos.
Octopus
Start: Make a magic circle.
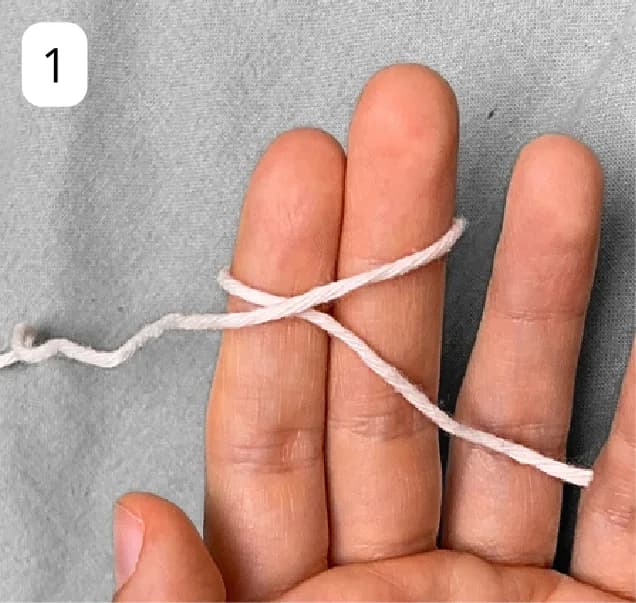
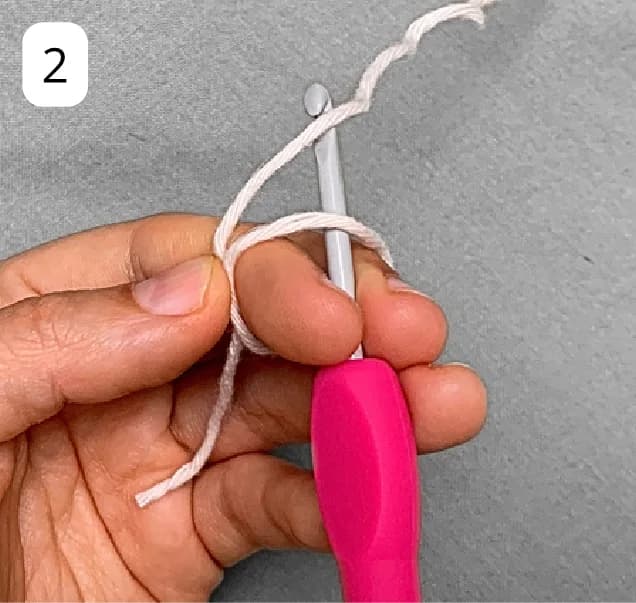
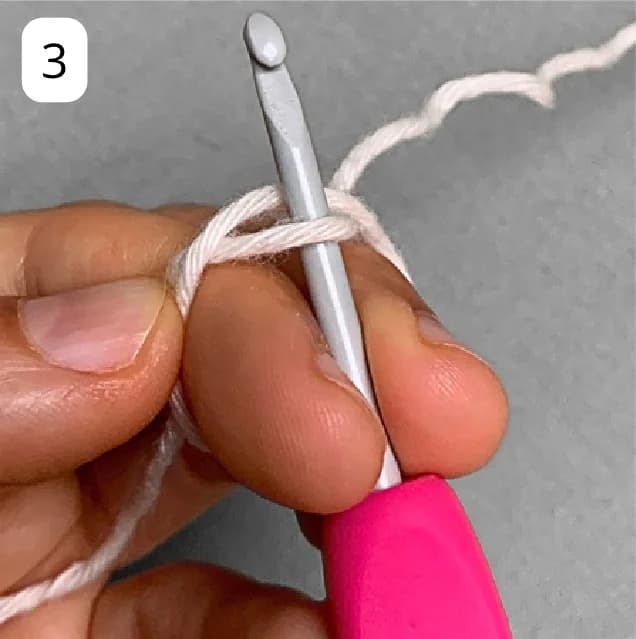
Step-by-step guide on how to make a magic circle:
- Hold the yarn in your hand with the tail end hanging down and the working yarn looped over your fingers.
- Wrap the yarn around your fingers, forming a circle. The working yarn should cross over the tail end of the yarn.
- Insert your crochet hook under the first strand of yarn and hook the second strand.
- Pull the second strand through the loop to create a slip knot. This slip knot will secure the magic circle.
- Remove your fingers from the loop, but keep the loop intact.
- Chain 1 to secure the loop and begin your first round of stitches.
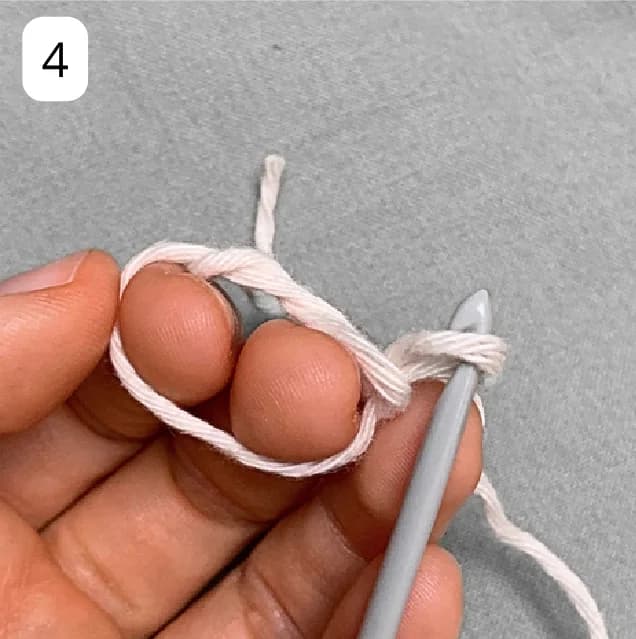
Row 1:
Make 6 sc In the space of the circle. Pull the tail end of the yarn to tighten the magic circle.
(Total sts at the end of the row: 6 sc)
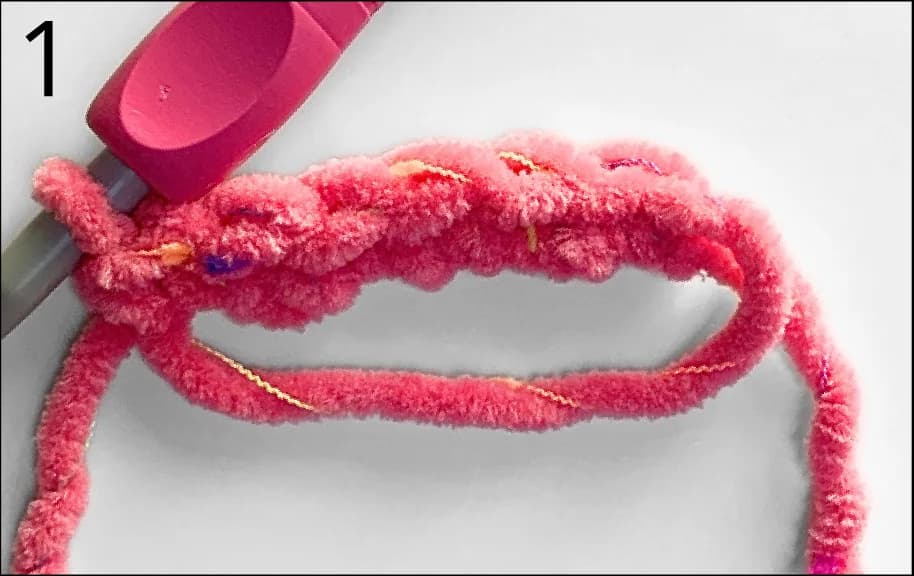
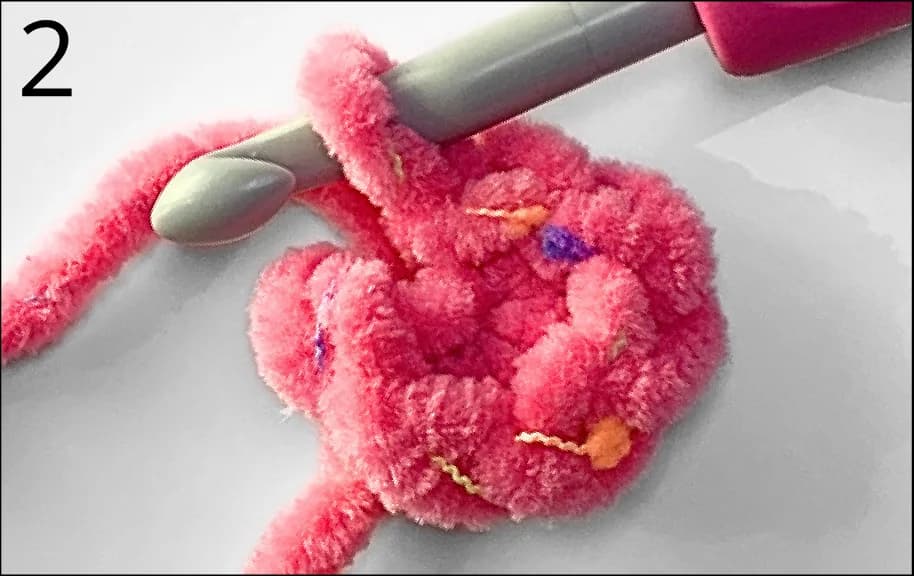
Row 2:
Sc inc in every st (Sc inc = 2 sc in 1 st).
(12 sc)
Tip: Use a stitch marker to keep track of your first stitch.
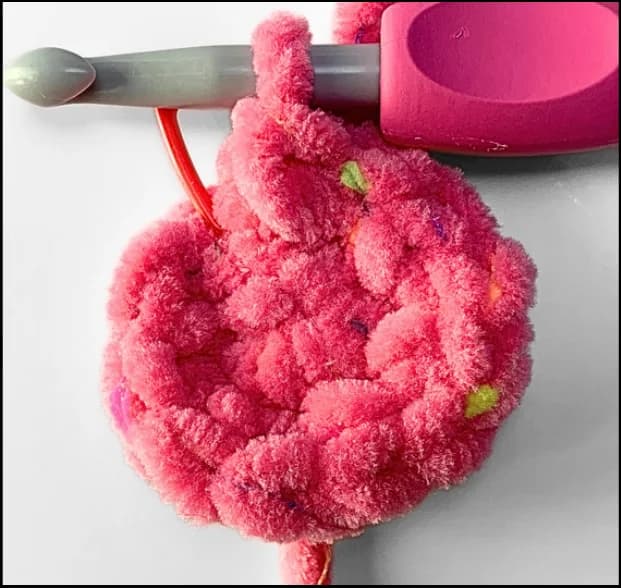
Row 3:
Sc inc in every second st.
Repeat: sc inc, sc...
(18 sc)
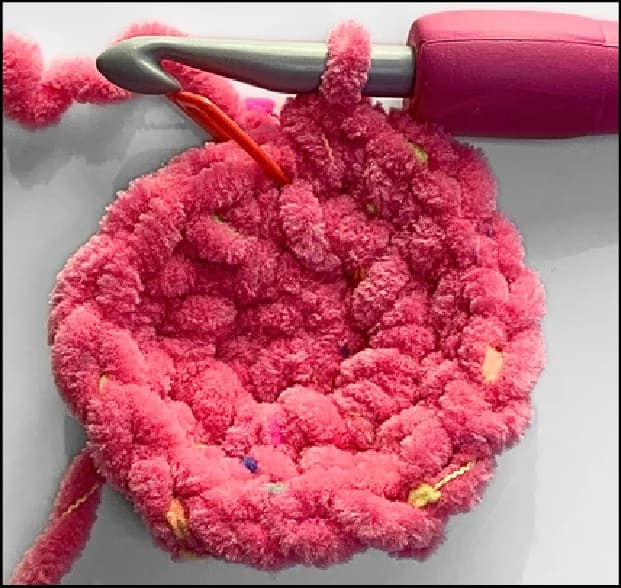
Row 4:
Sc inc in every third st.
Repeat: Sc inc, sc, sc...
(24 sc)
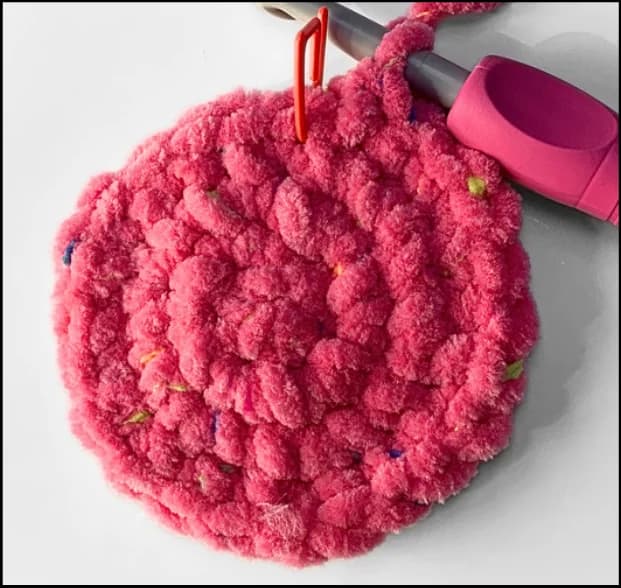
Row 5-9:
Sc in every st.
(24 sc)
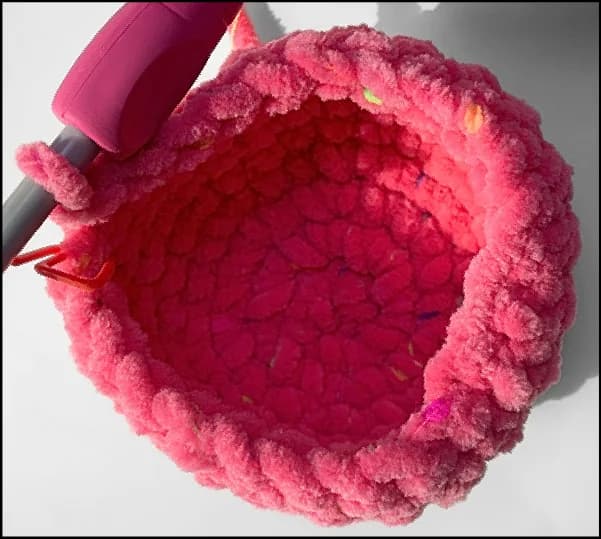
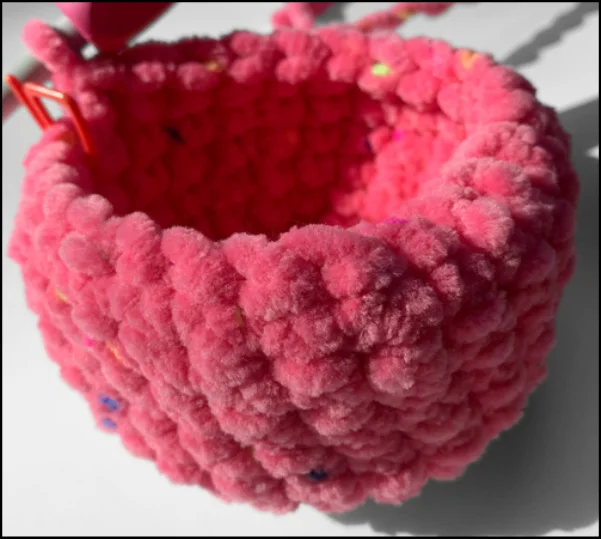
Row 10:
Sc dec in every third st.
Repeat: Sc dec, sc, sc...
(18 sc)
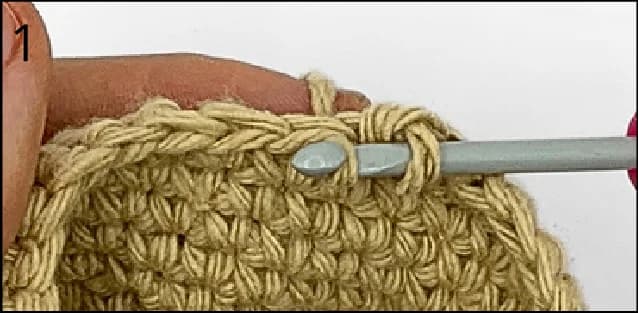
How to make a Single Crochet Decrease (sc dec):
- Insert your hook into the next stitch and yarn over.
- Pull up a loop – you now have 2 loops on your hook.
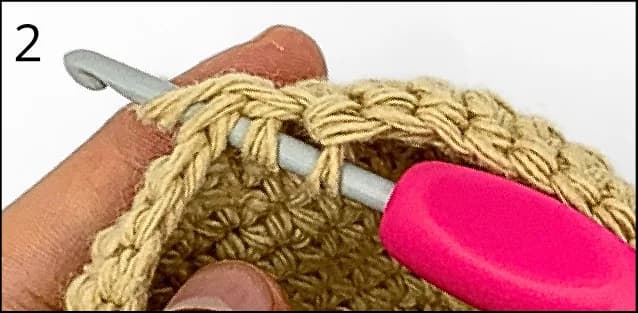
- Insert your hook into the following stitch and yarn over again.
- Pull up another loop – you now have 3 loops on your hook.
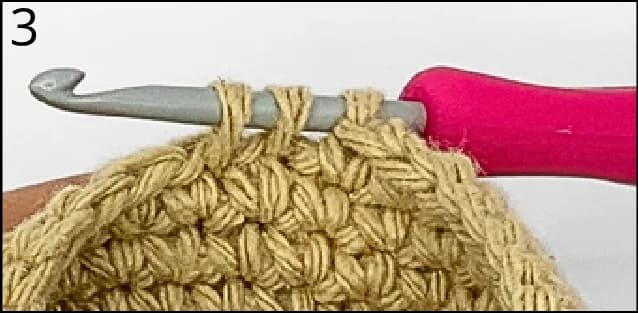
- Yarn over once more and pull through all 3 loops on the hook.
You have now turned two stitches into one – that’s a decrease!
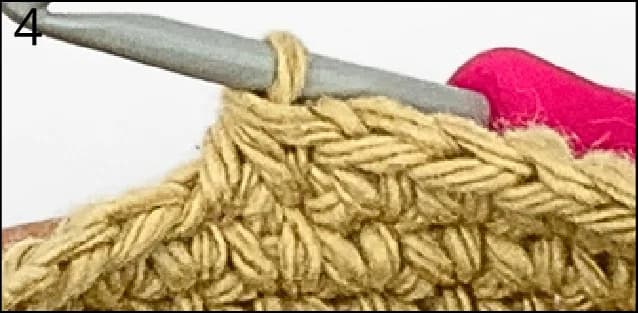
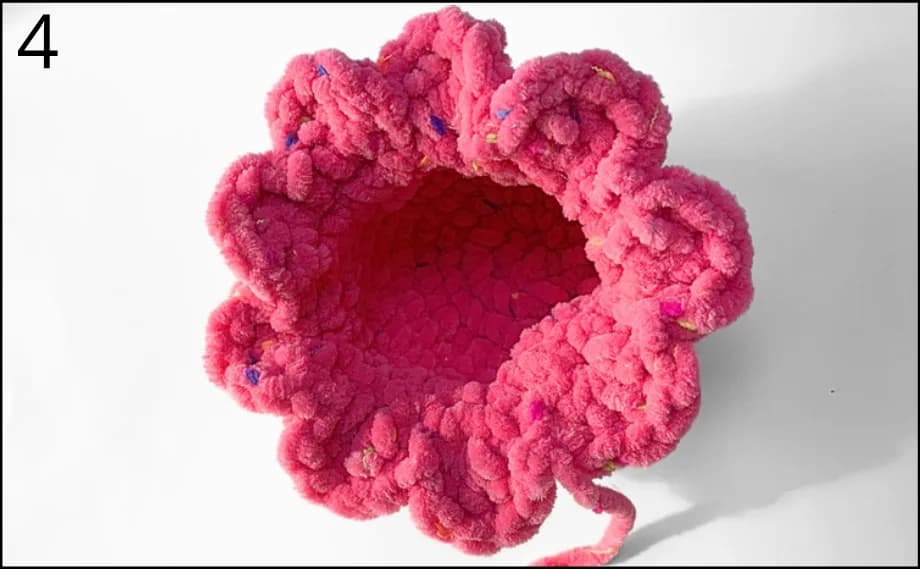
Row 11: (Tentacles)
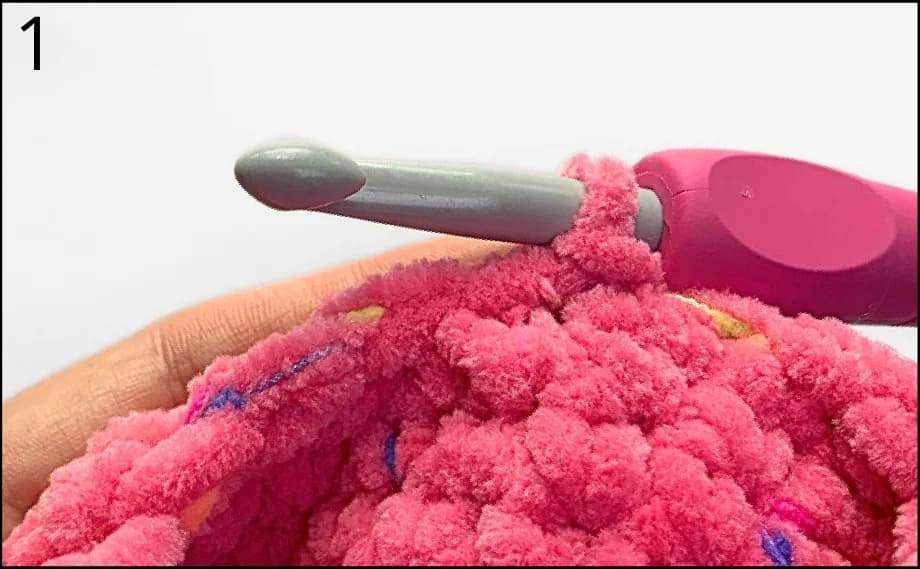
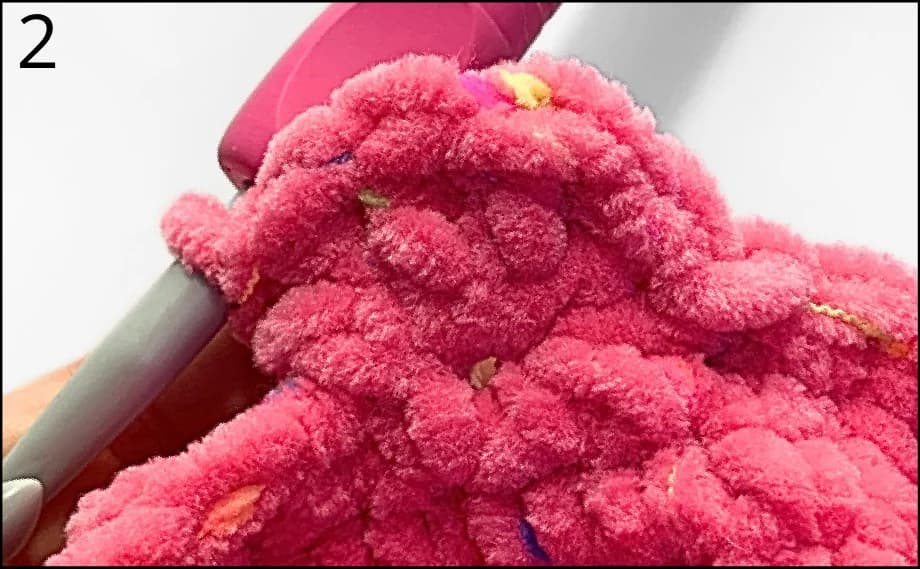
Sl st, 5 dc in next st...
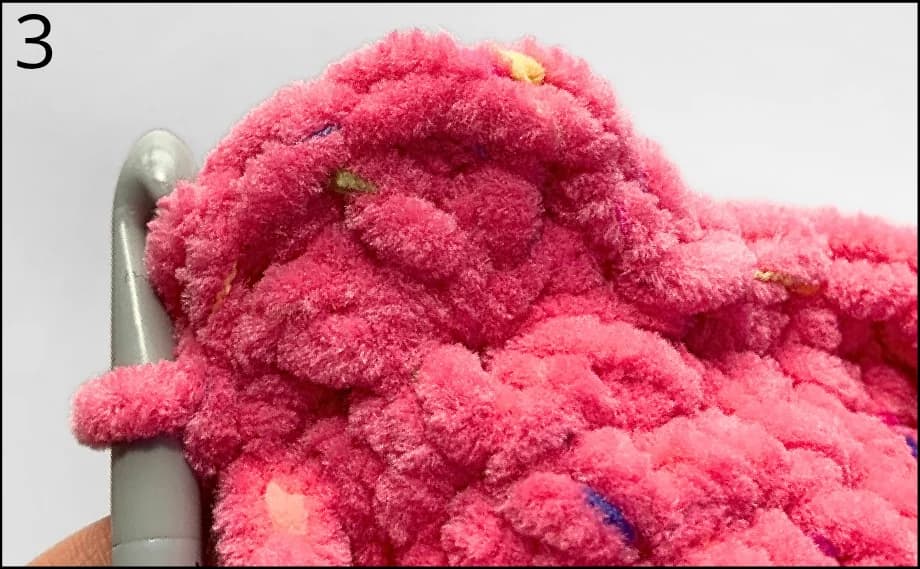
Repeat [Sl st in next st, 5 dc in next st] around until you have made 9 tentacles in total.
Finishing the row: Sl st in the first sl st, ch 1. Cut the yarn, leaving a long tail for sewing. Pull the yarn through the ch 1 to secure.
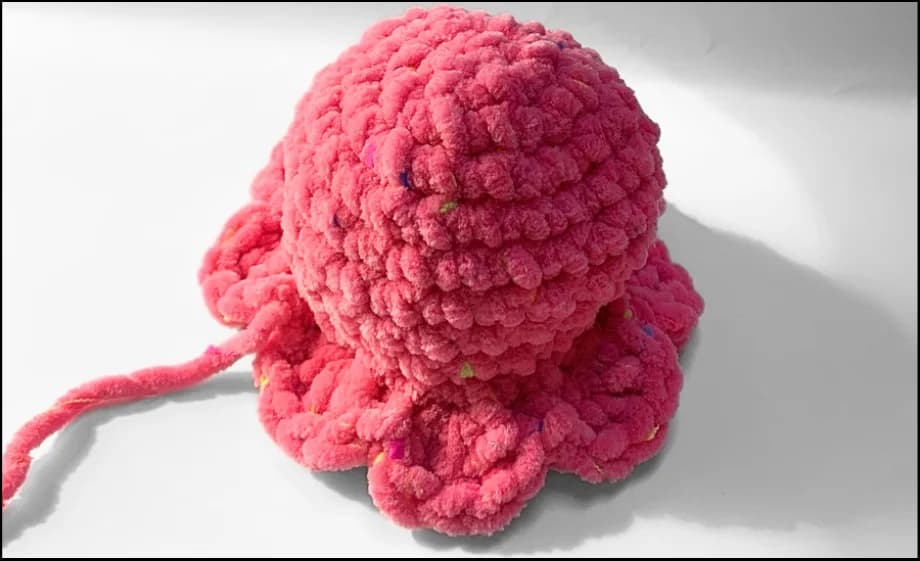
Repeat the pattern:
First part done! Grab a contrasting color and repeat the entire octopus pattern one more time until you have two pieces like this.
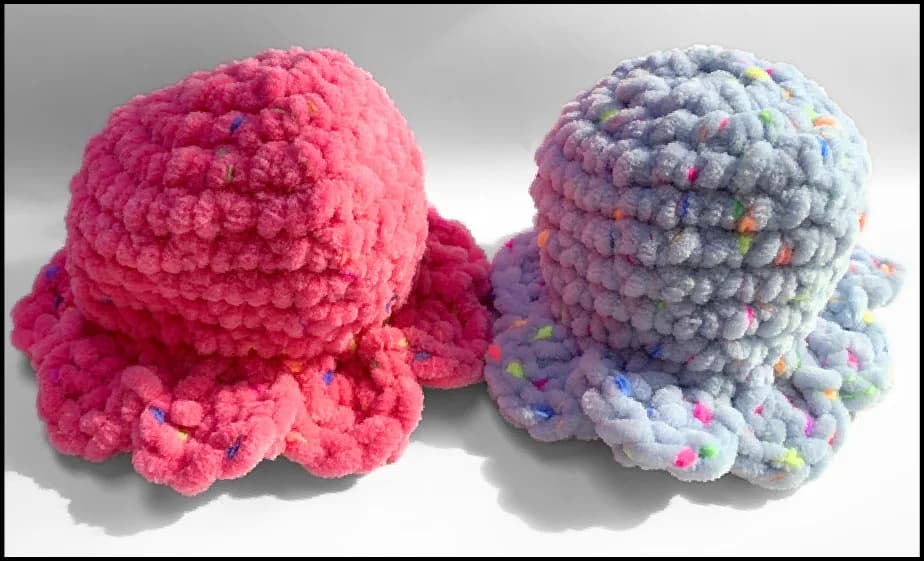
Happy face embroidery
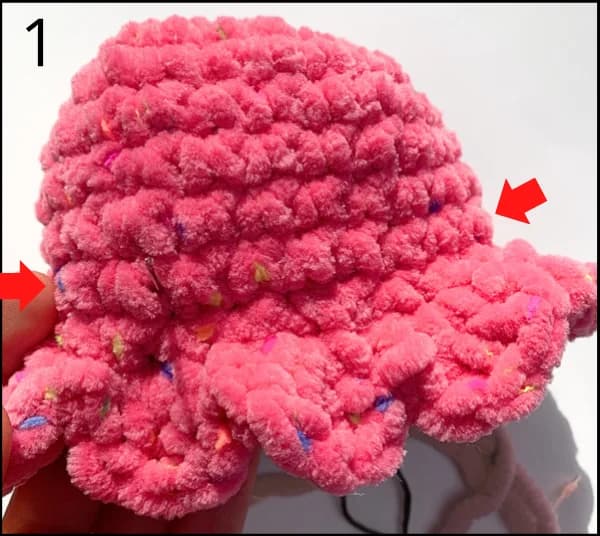
Embroidering the eyes:
- Cut a piece of embroidery thread and thread your needle.
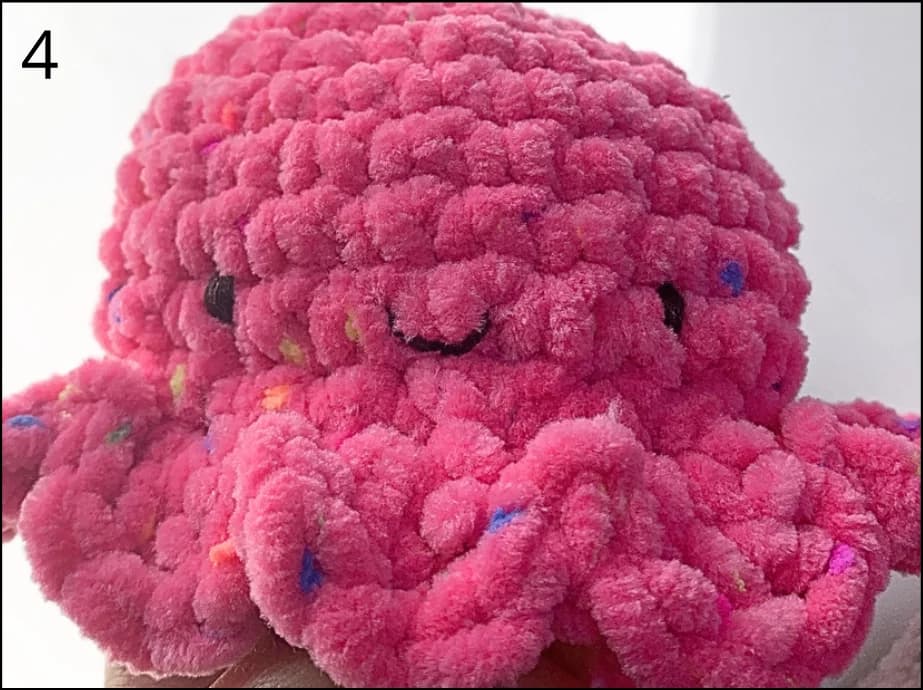
- Work the eyes on the second row from the bottom (right above the tentacles), as indicated by the red arrows in the photo.
- Insert the needle at the bottom of the stitch where you want the first eye, and bring it out at the top of that same stitch.
- Repeat this exact path 6 times to make the eye thicker and more visible.
- Secure the thread on the inside of the body with a knot and trim the end.
- Repeat the process for the second eye. Leave about 5 stitches of space between the eyes, making sure they are even.
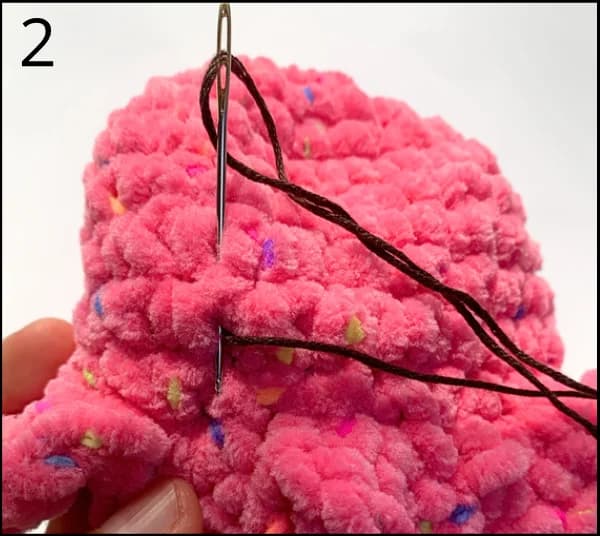
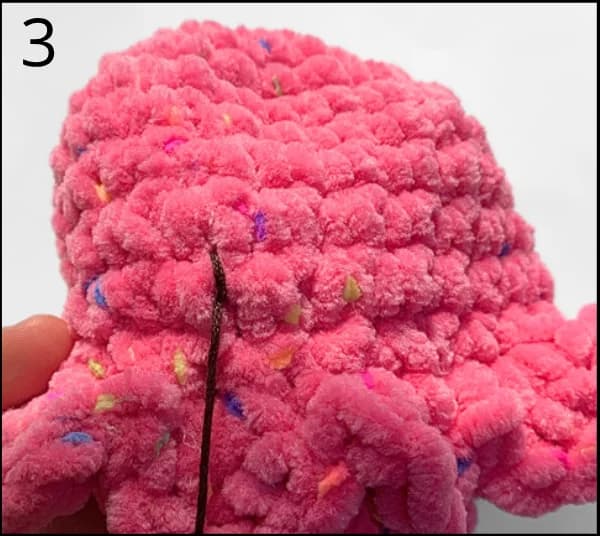
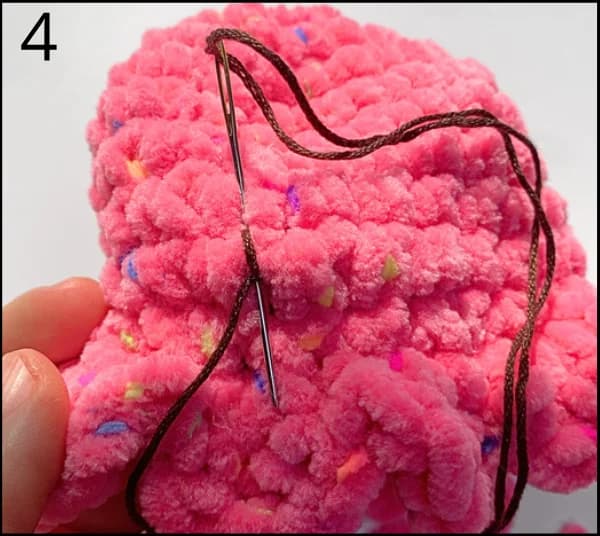
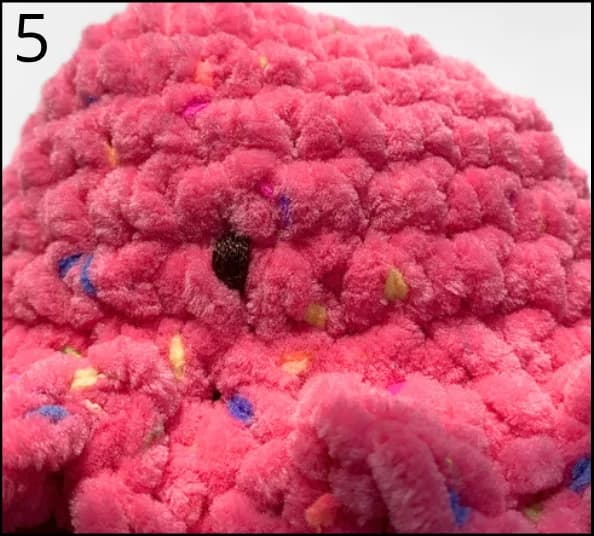
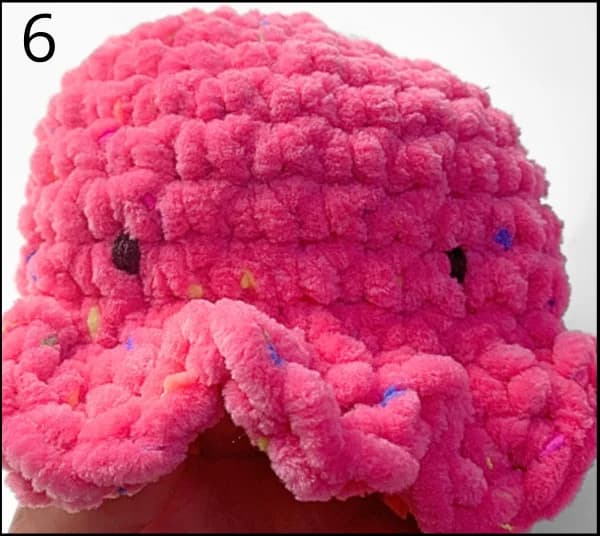
Optional:
You can also choose to use beads for the eyes instead of embroidery for a different look. Simply sew them securely in place.
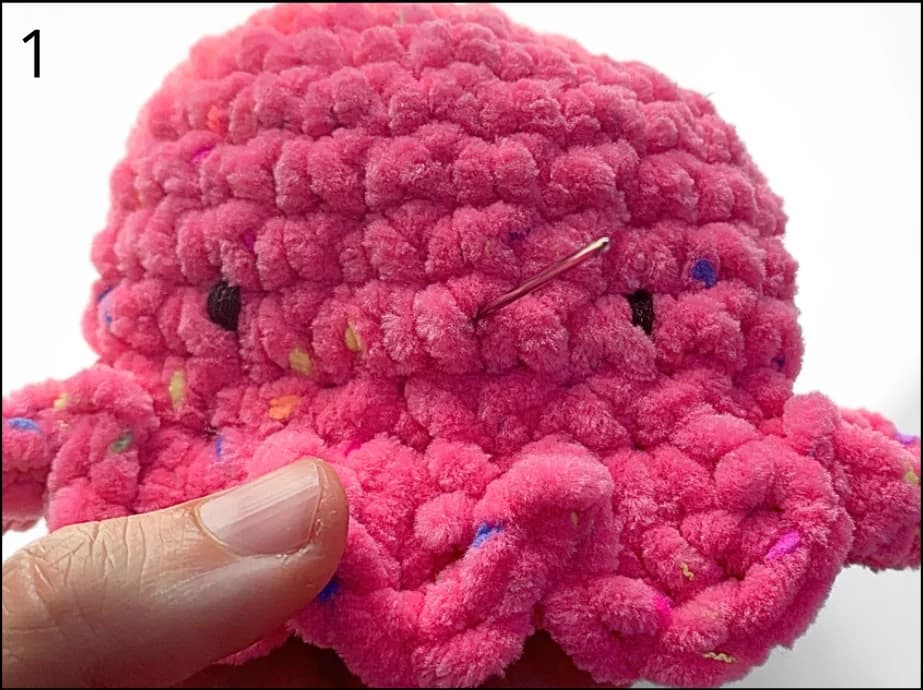
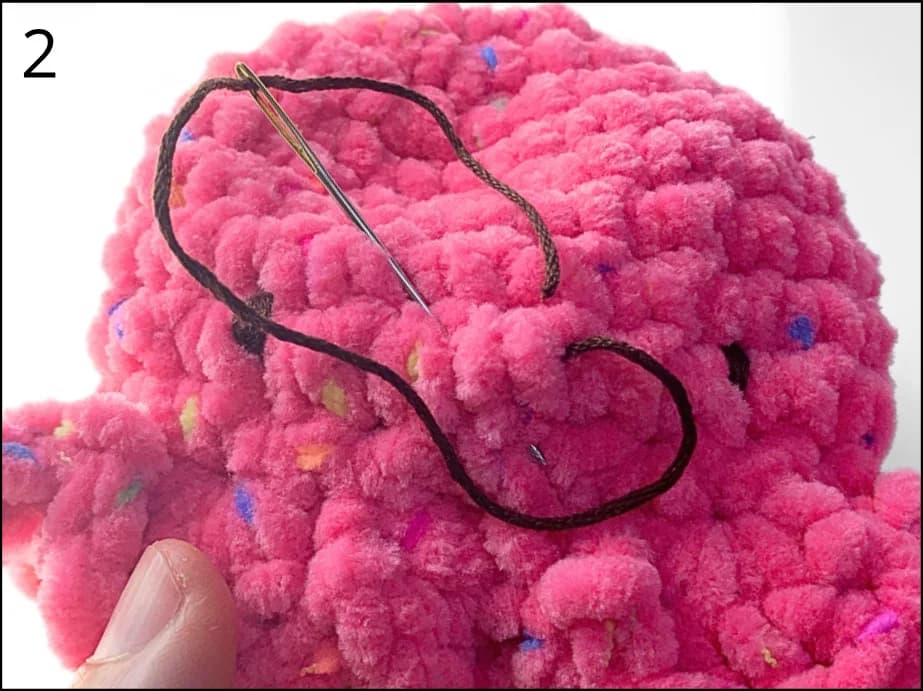
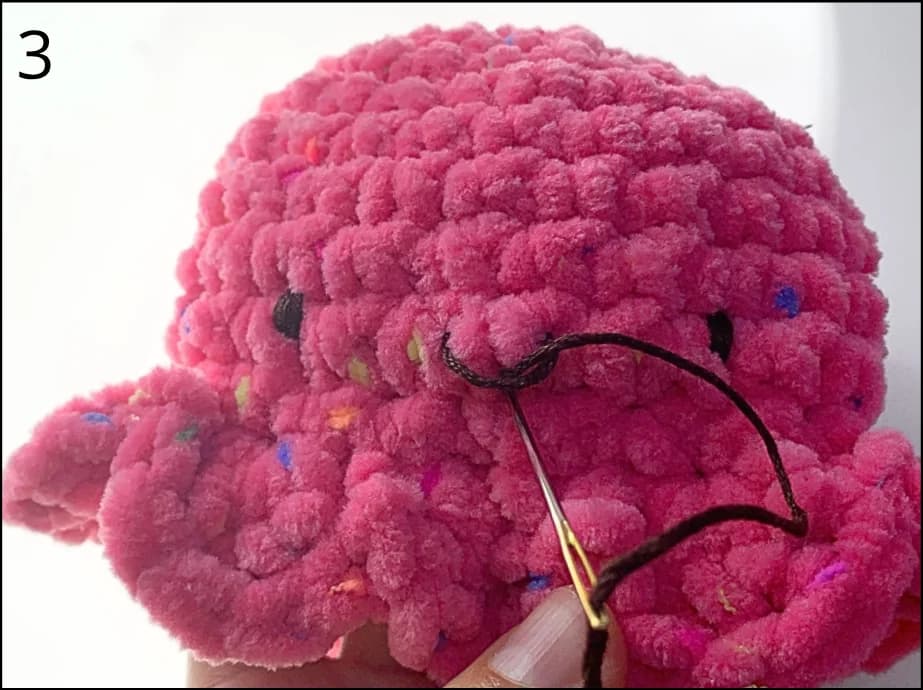
Embroidering the mouth:
- Bring the needle up where you want the mouth to start (centered between the eyes).
- Insert the needle where you want the mouth to end.
- Bring the needle up again at the lowest point of the mouth.
- Lay the thread into a smile shape and hold it in place.
- Insert the needle back down into the same stitch to secure the curve.
- Secure the thread on the inside of the body with a knot and trim the end.
Angry face embroidery
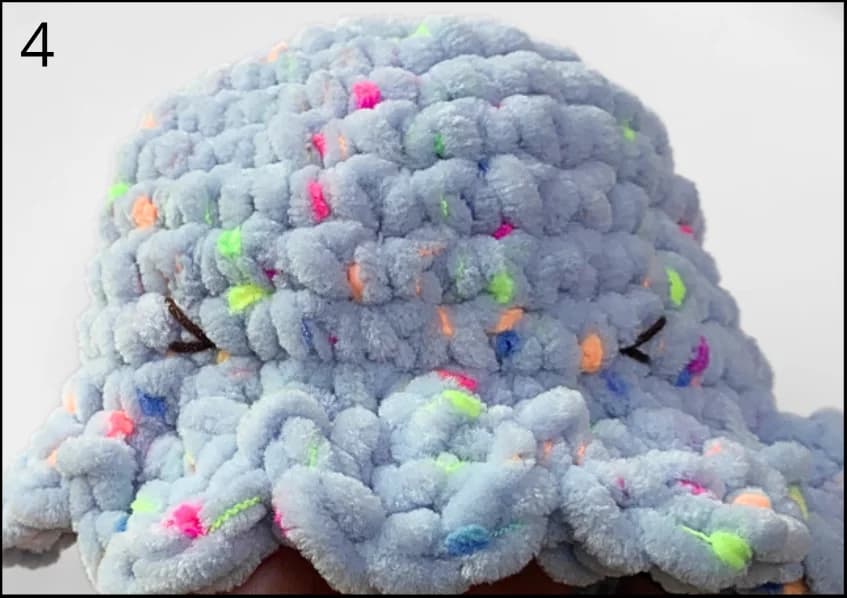
Embroidering the closed eyes:
- Work the eyes on the second row from the bottom (right above the tentacles), as indicated by the red arrows in the photo.
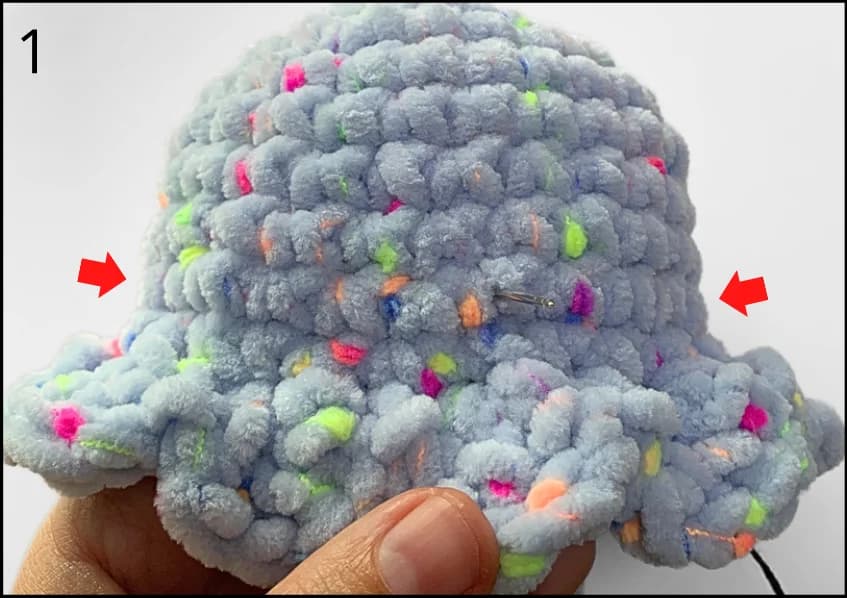
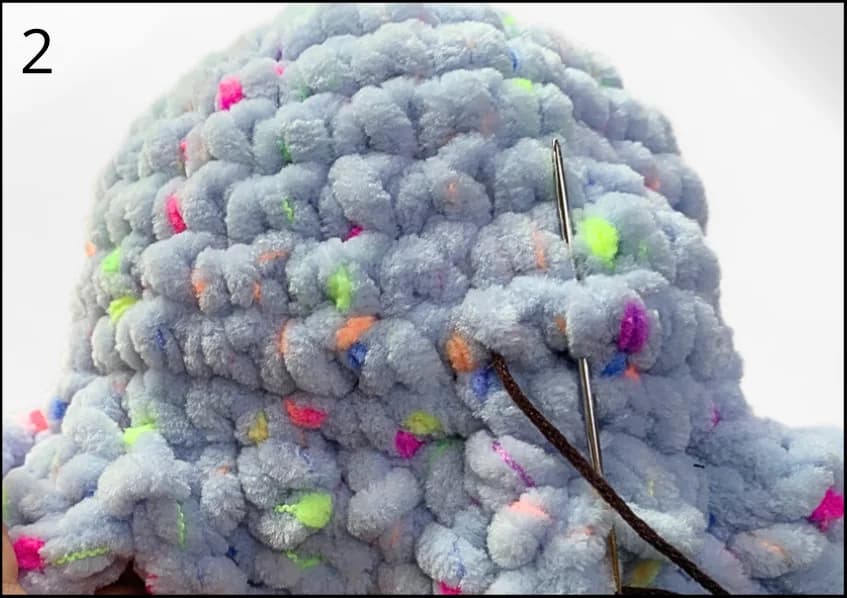
- Bring the needle up through the stitch where you want the inner corner of the eye to start.
- Insert the needle down where you want the bottom line of the eye.
- Bring the needle back up where you want the top line of the eye to end.
- Insert the needle back down at the same stitch as the inner corner.
- Secure the thread on the inside of the body with a knot and trim the end.
- Repeat the process for the second eye, leaving about 5 stitches of space between the eyes and making sure they are even.
- Secure the thread on the inside of the body with a knot and trim the end.
Optional:
You can also choose to use beads for the eyes instead of embroidery for a different look. Simply sew them securely in place.
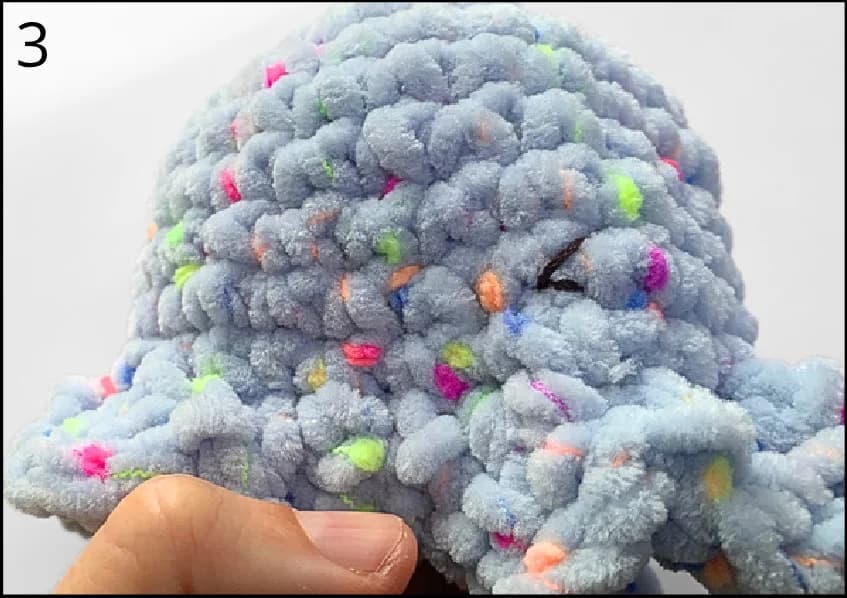
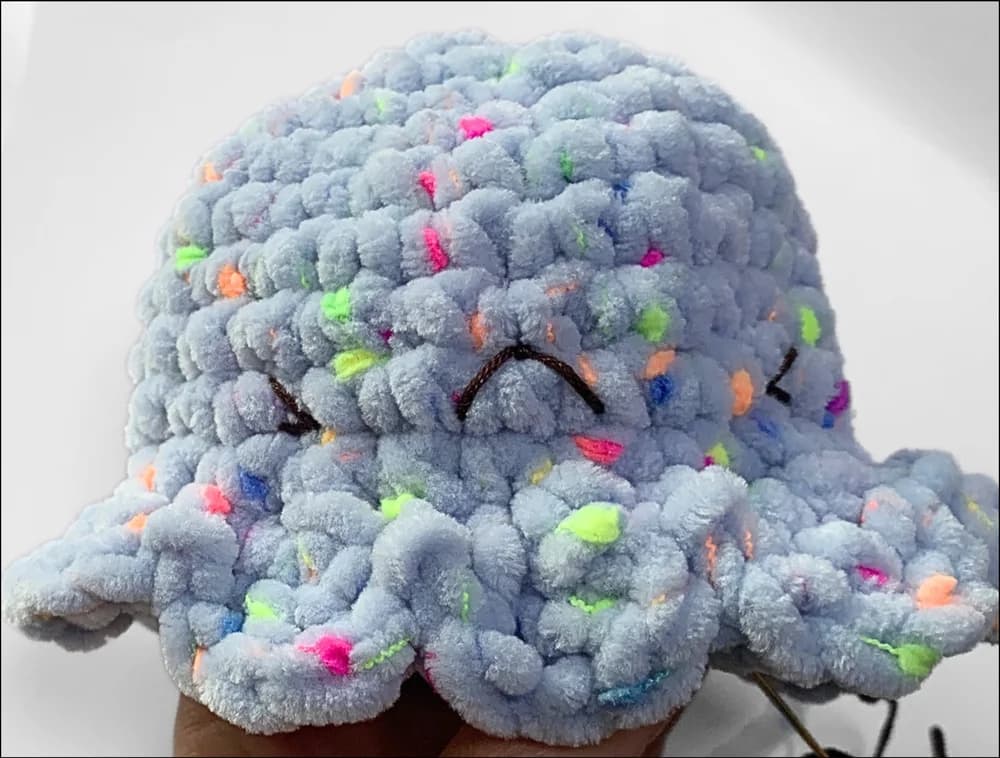
Embroidering the mouth:
Follow the same steps as for the happy mouth, but shape the thread into an angry mouth instead.
Assembling the Octopus
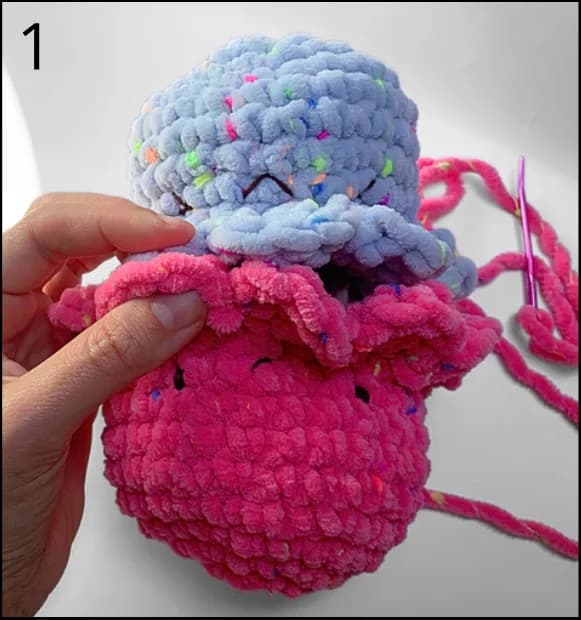
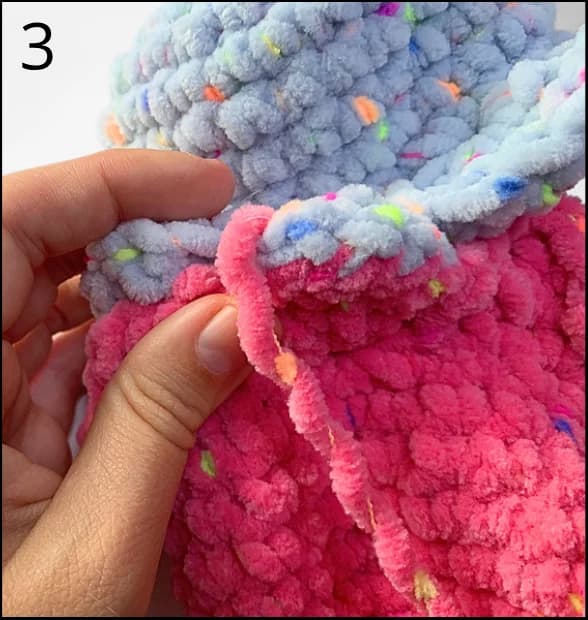
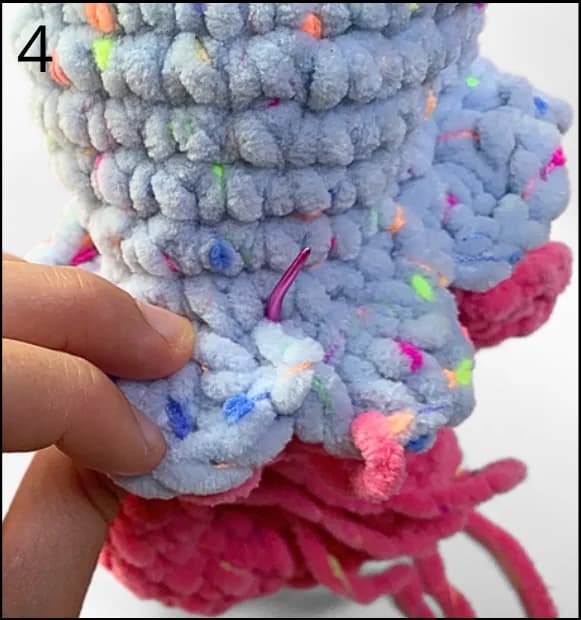
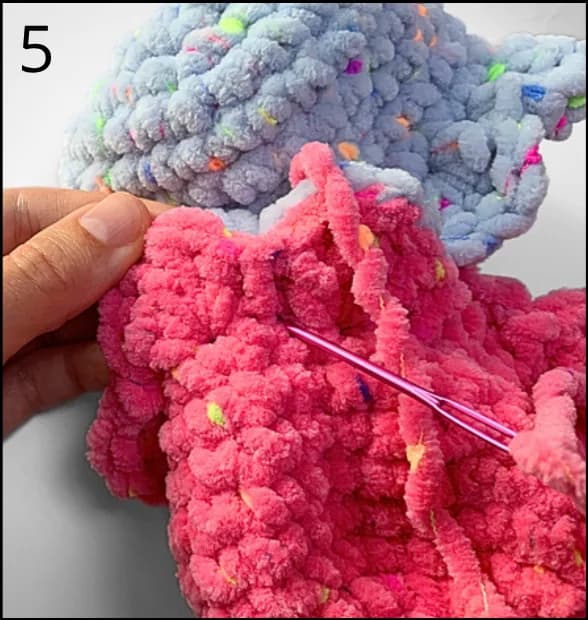
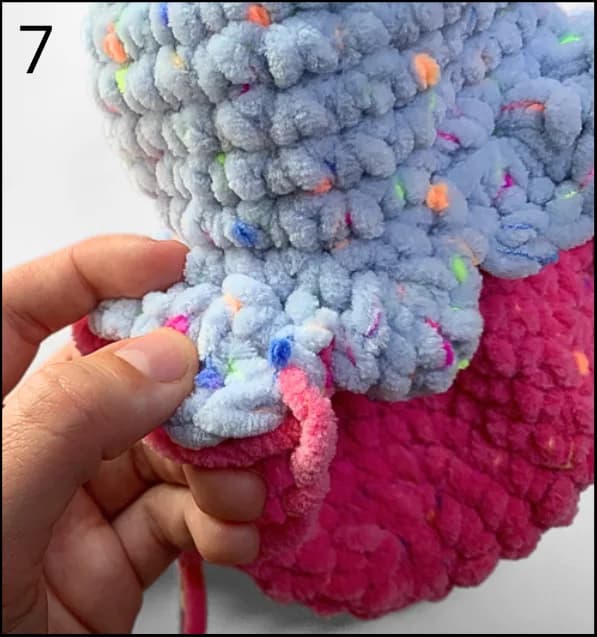
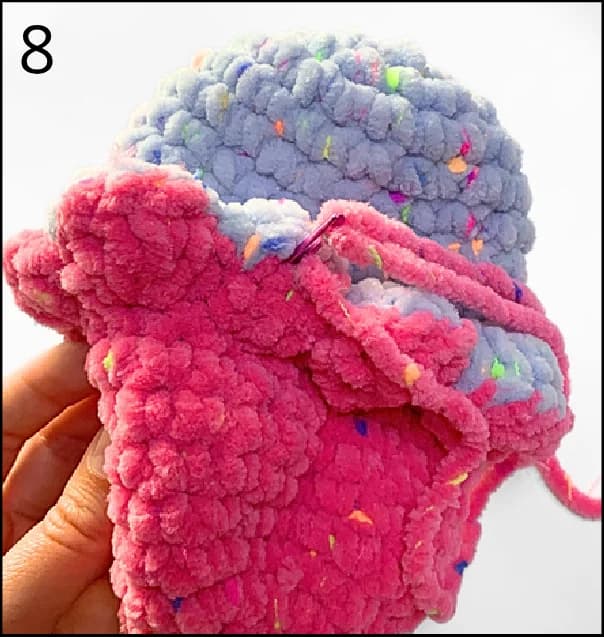
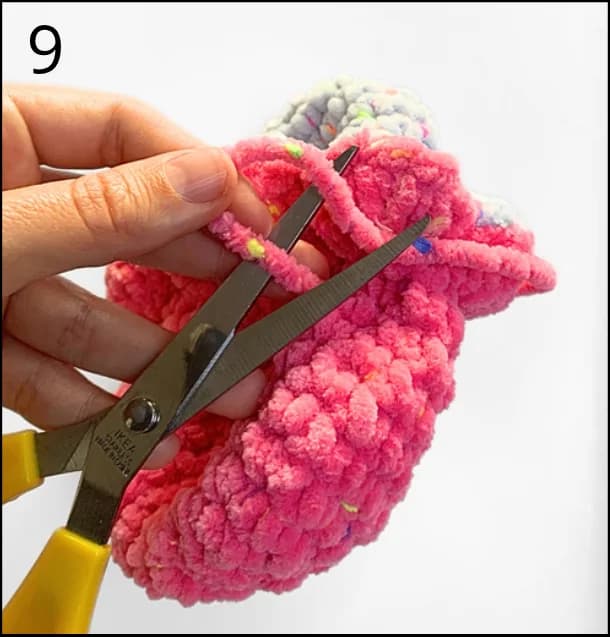
Sewing the octopus bodies together:
- Thread a yarn needle with the long tail from one of the octopus bodies.
- Place the two bodies tentacle-side to tentacle-side, making sure the faces are oriented in the same direction.
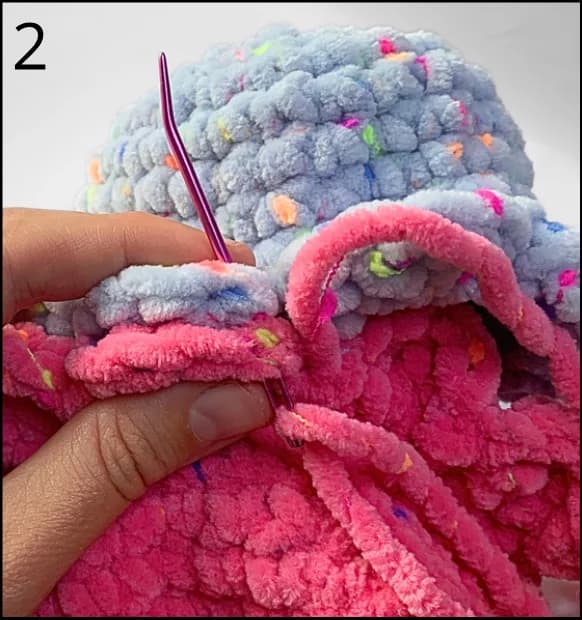
- Starting at one tentacle, sew through the stitches of both tentacles from one side only.
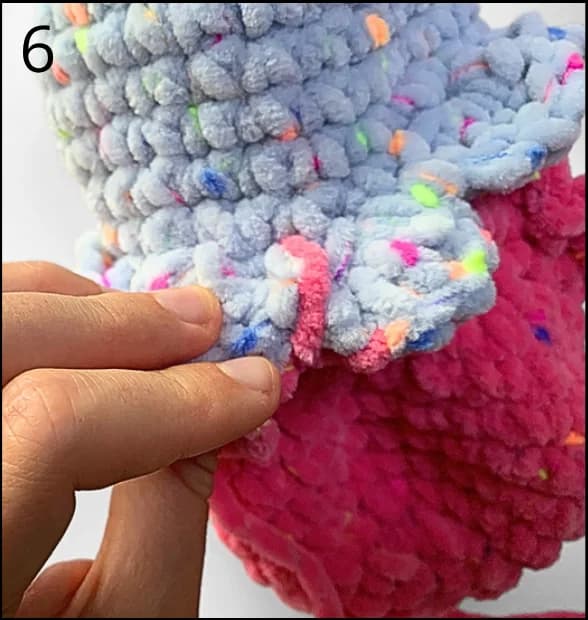
- When you reach the space between tentacles (where there is a slip stitch), insert the needle into a stitch one row in from the edge and pull tight. This will define the individual tentacle and tuck the fluffy yarn neatly into the body.
- Continue sewing around all tentacles, repeating the above step at each slip stitch. Make sure the tentacles stay aligned.
- Once all tentacles are joined, secure the yarn with a knot. Hide the end by inserting the needle inside the body and out through any stitch, trim the end, and let it slip back inside to disappear.
You're done!
Great job! Enjoy your reversible octopus!
Download
Would you rather have the PDF?
Everything is already here on the page. The PDF is the same pattern in a print-ready layout with page numbers — handy to print or keep on your phone while you crochet. Enter your email and I will send it straight over.
Cover and materials 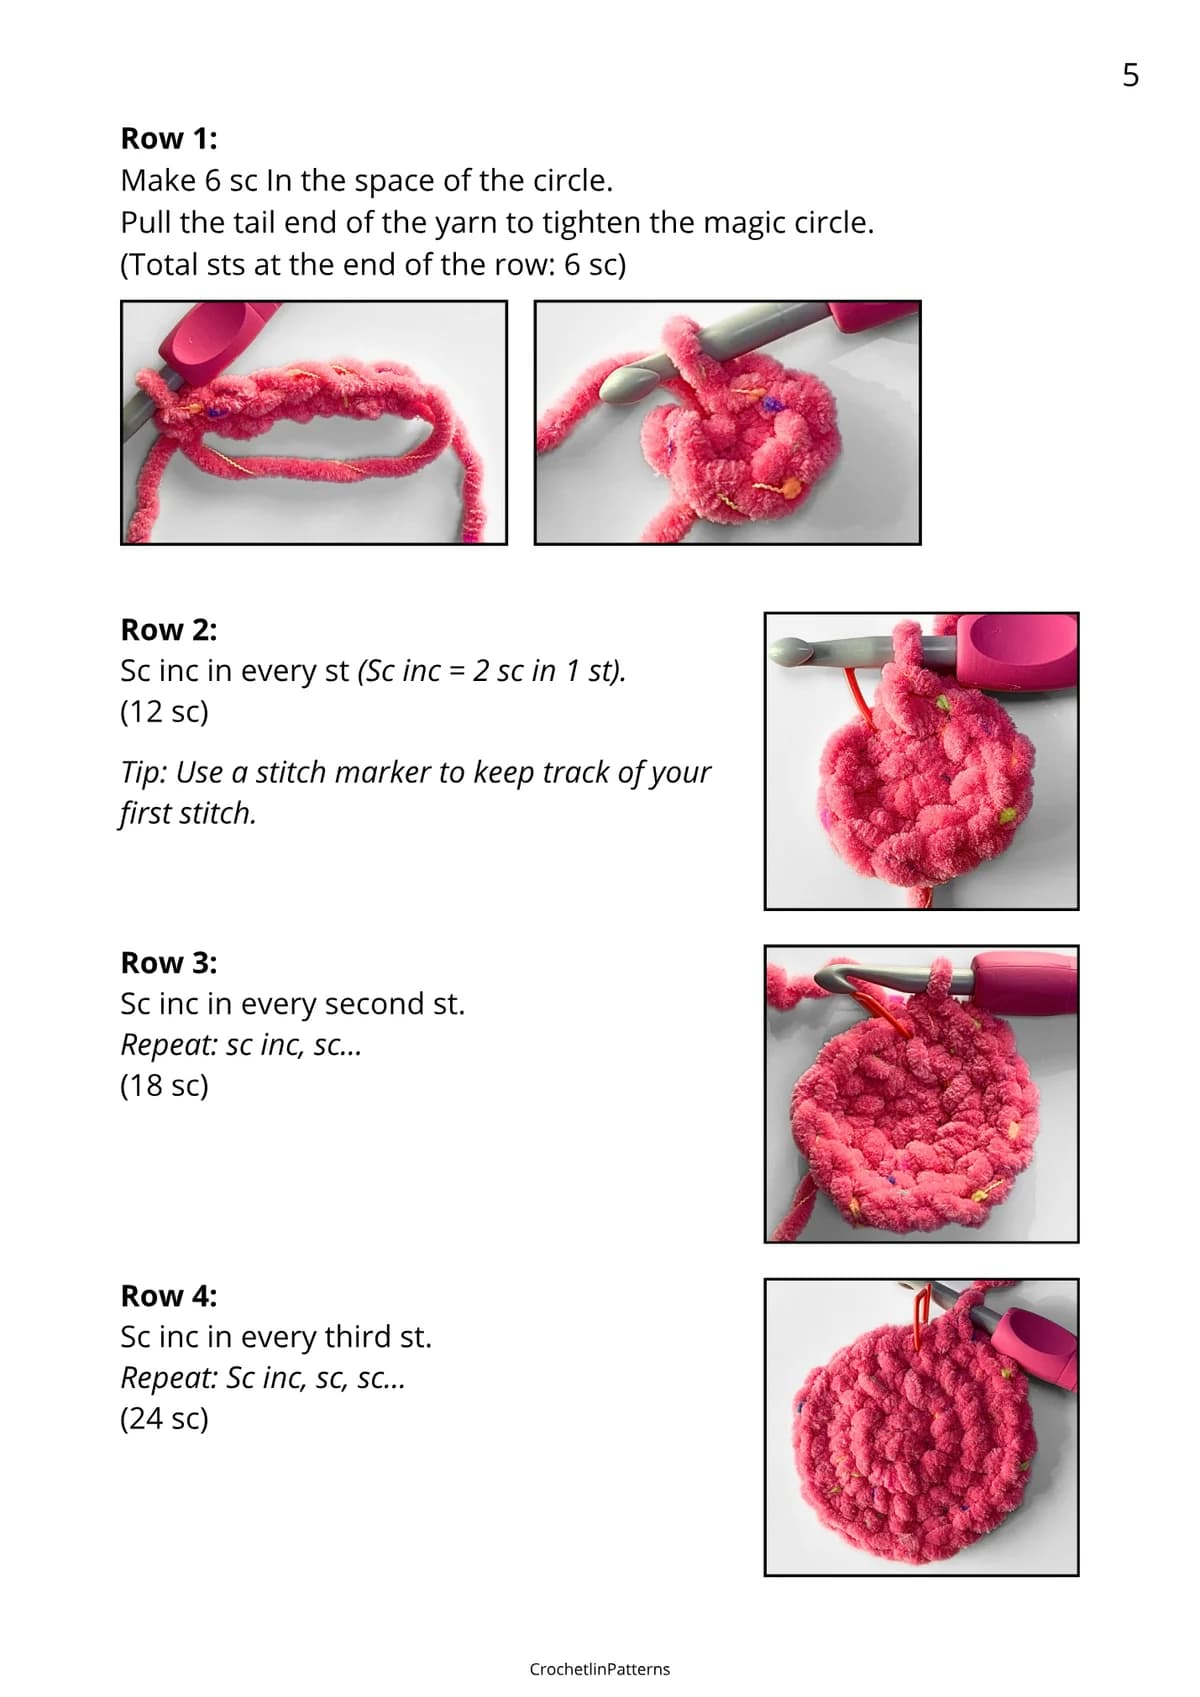
Rounds 1–4 with photos 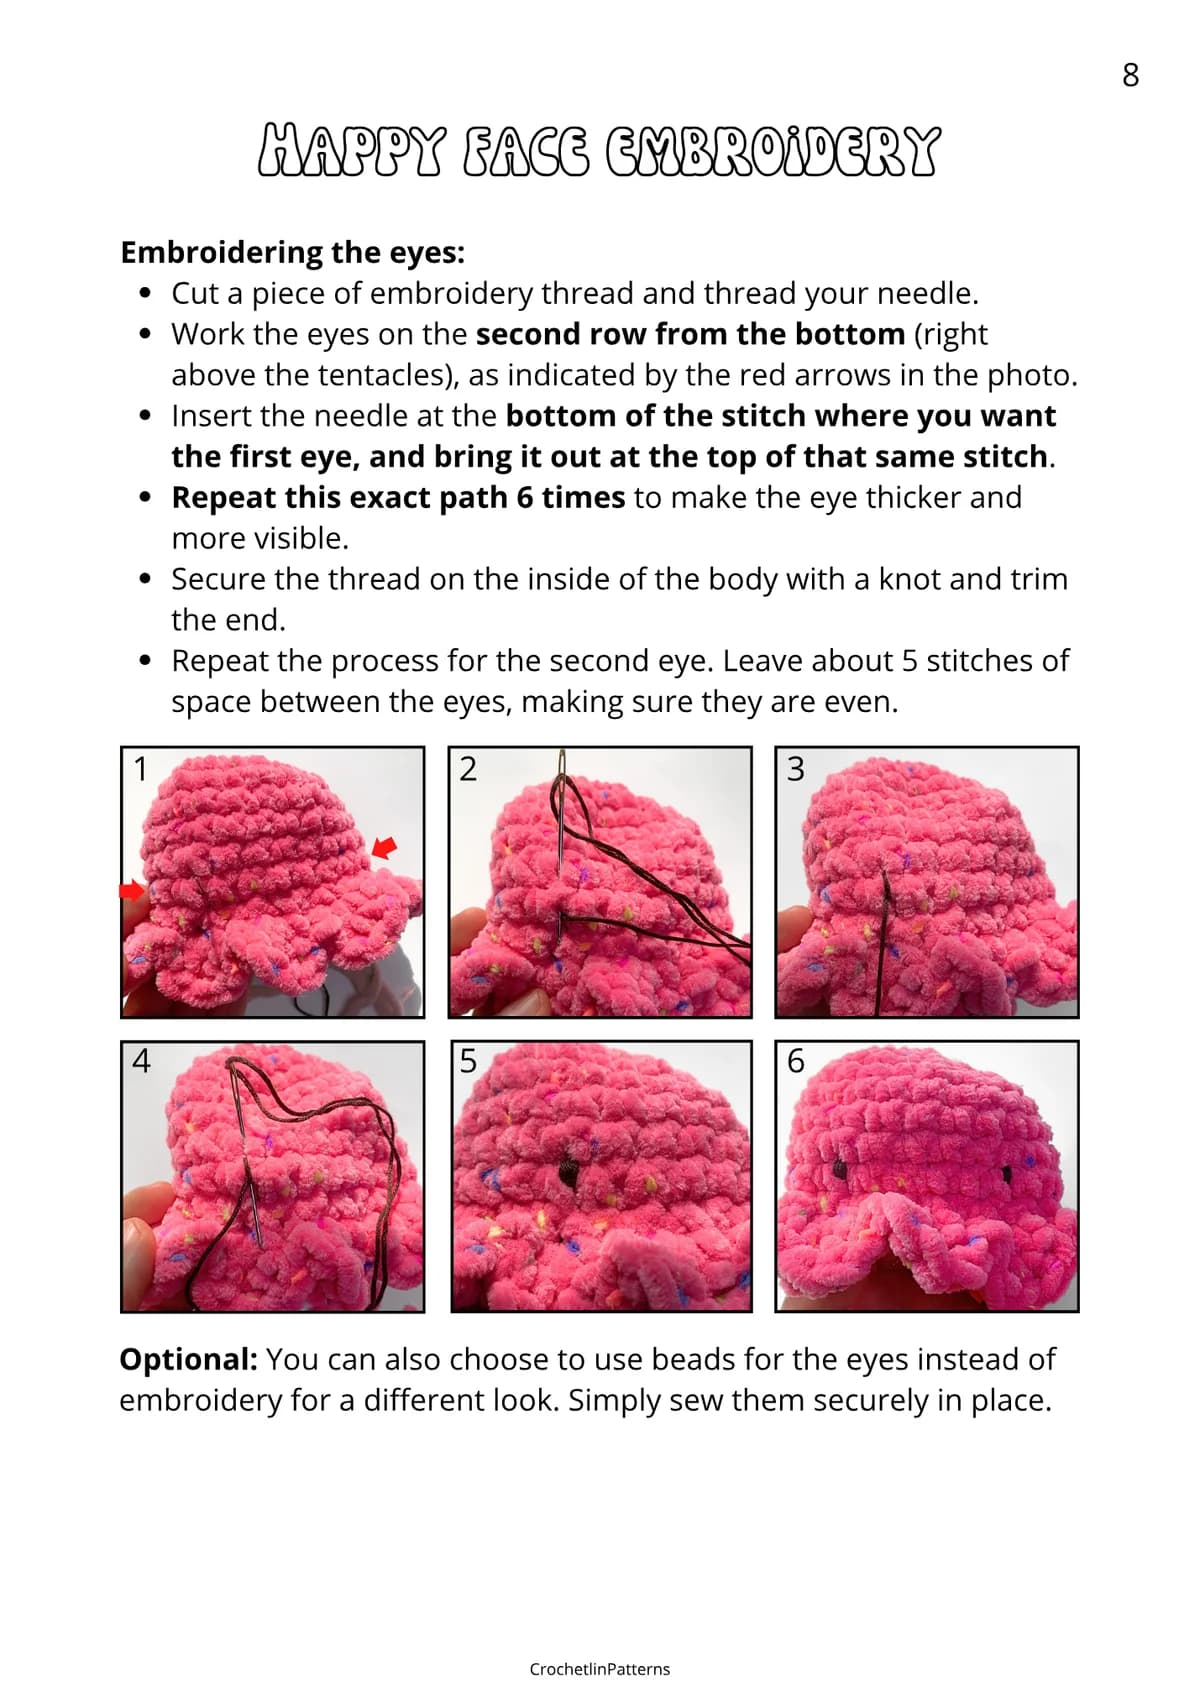
Embroidering the face 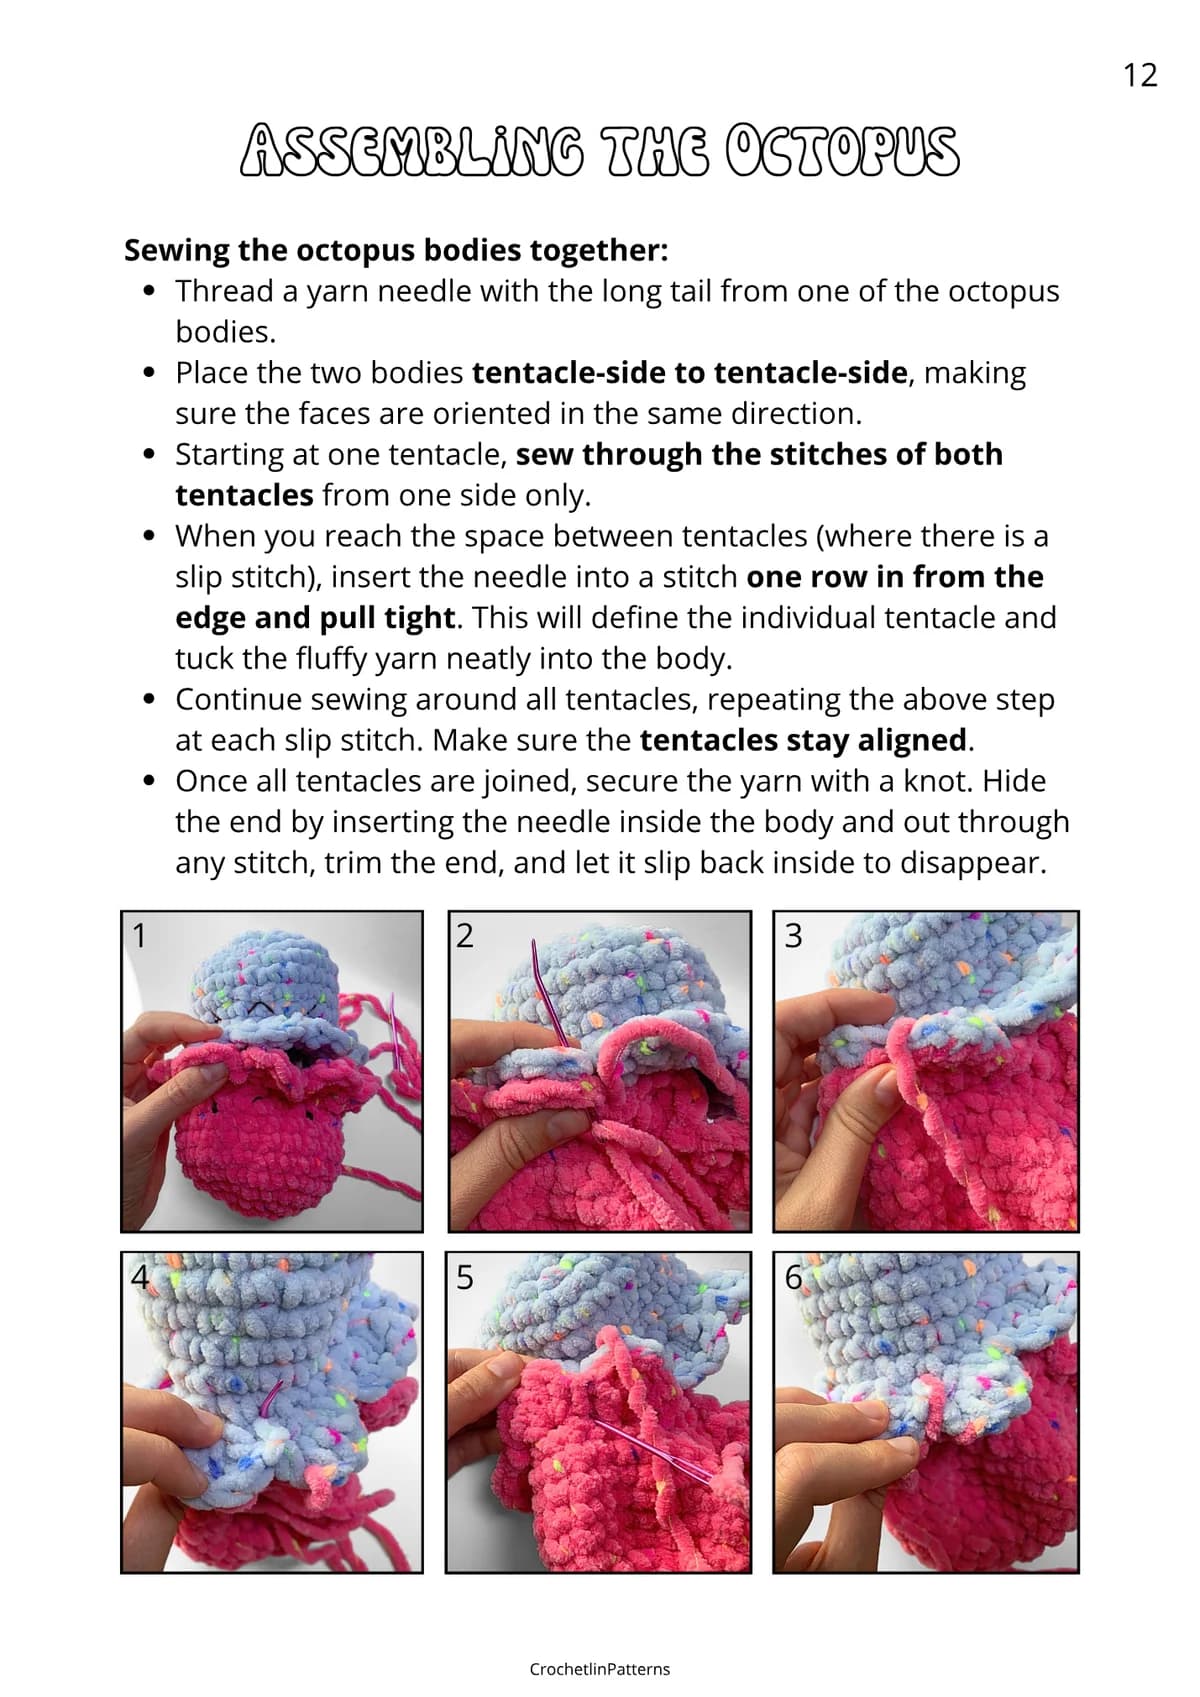
Assembly step by step
More patterns
Liked the way the pattern was put together? The rest of my patterns follow the same layout, with photos for every step.
Go to the shop