
amigurumi · decrease · technique · single crochet · beginner
The invisible decrease: shaping amigurumi without the holes
By Elin · November 2, 2026
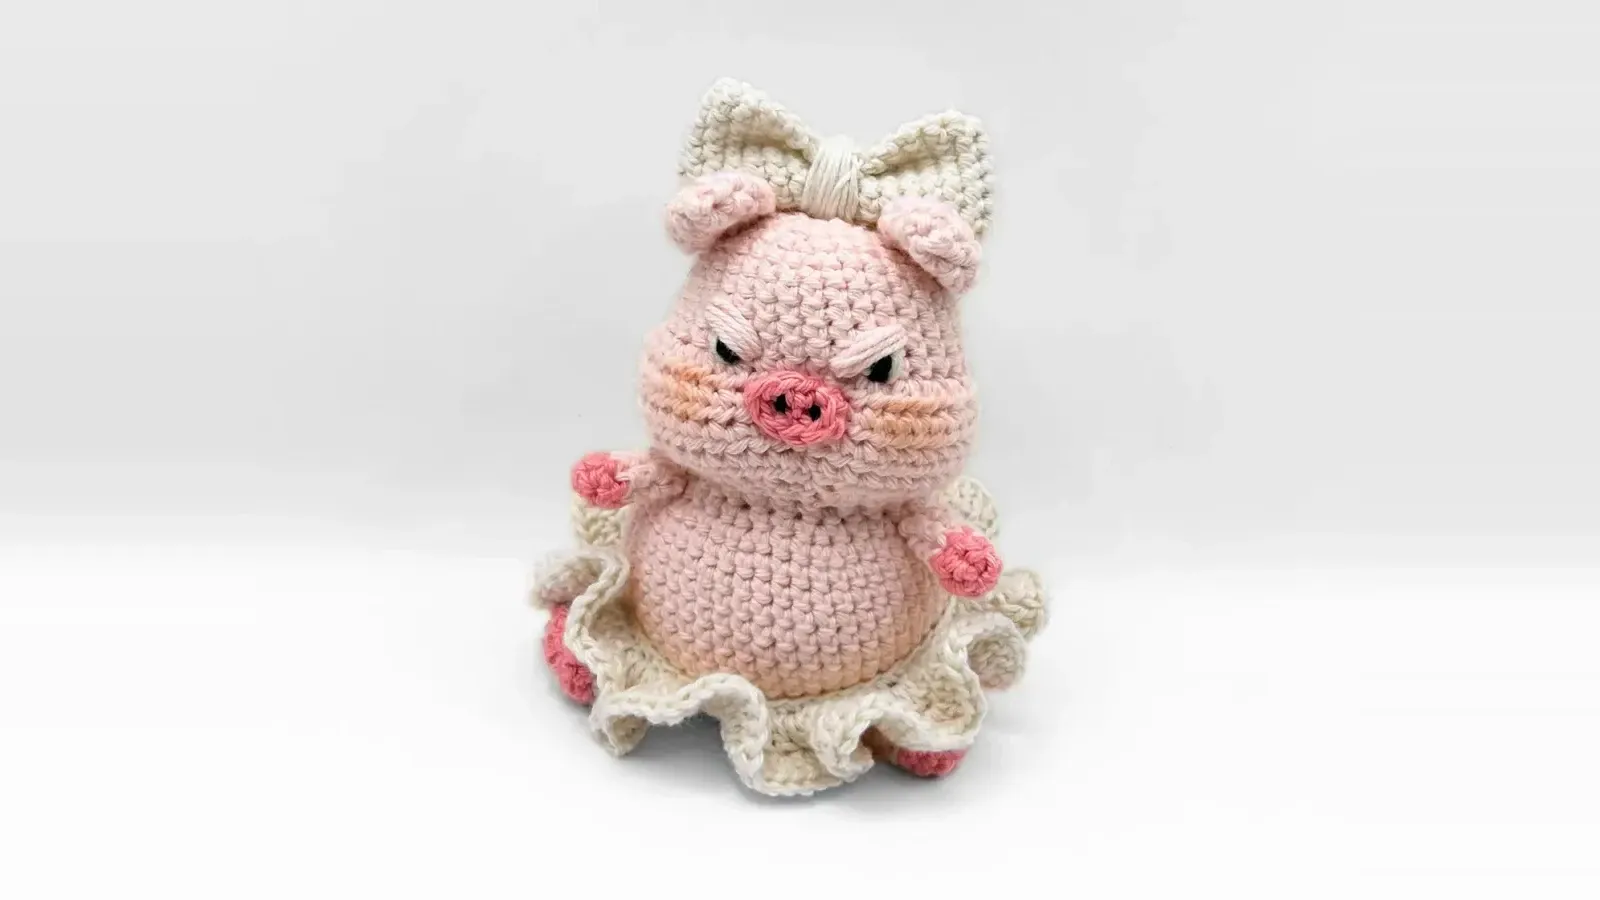
Crochet amigurumi and sooner or later you reach the point where the shape has to narrow. That is where you decrease, and it is where most figures lose their smooth surface.
The decrease most of us learn first leaves a small hole and a stitch wider than the ones beside it. The figure is stuffed, so the hole shows: the filling glows through as a pale dot. Because you decrease in roughly the same places round after round, the dots line up into a seam where no seam belongs.
The invisible decrease fixes that.
How to work the invisible decrease
The top of a stitch is a small V made of two strands. The back loop is the one furthest away from you, and it is the only one you pick up here.
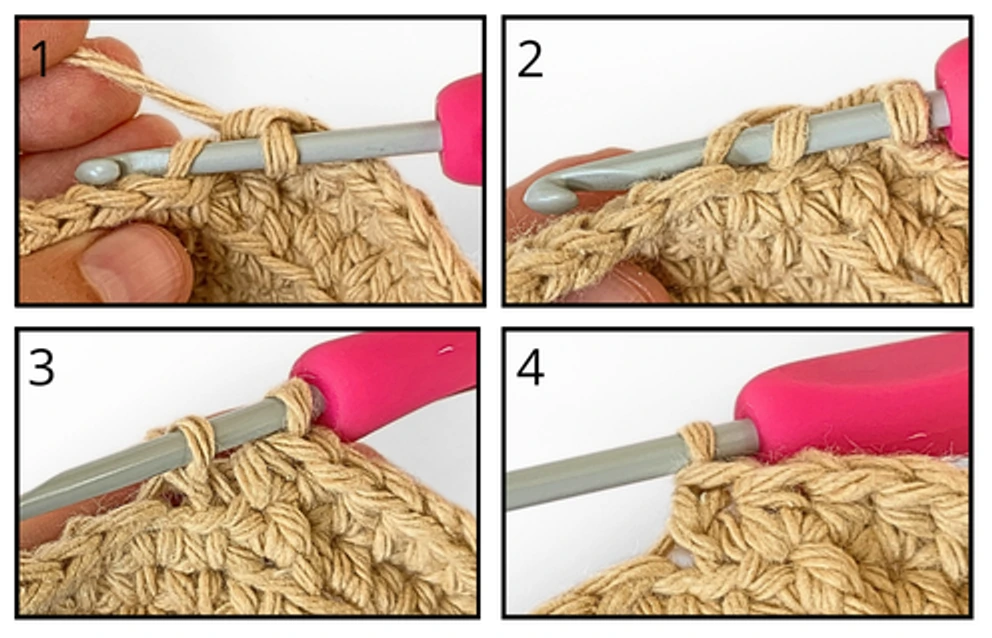
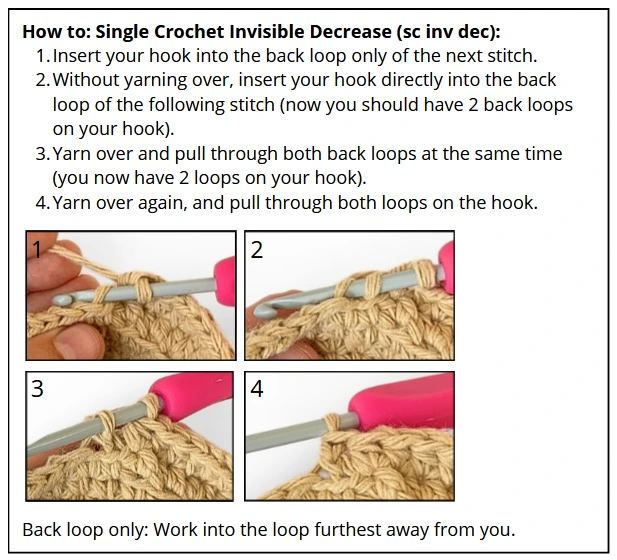
- Insert your hook into the back loop only of the next stitch.
- Without yarning over, insert your hook directly into the back loop of the following stitch. You now have two back loops on your hook.
- Yarn over and pull through both back loops at the same time. You now have two loops on your hook.
- Yarn over again and pull through both loops on the hook.
That is the whole decrease. Step two is the one that feels wrong in your hands, because every other stitch you know starts with a yarn over. Do not do it here. The hook goes into both loops first, the yarn comes after.
Note: which loop you take depends on how you work your figure. Read the part below before you make your first decrease.
Front or back loop depends on how you work
The steps rest on one simple rule: take the loop that faces the outside of the figure. That side is the one that has to look smooth, so that is where the decrease has to disappear.
I work my figures right side out and never turn them. The back loop is the one sitting against the outside, which is why the steps above say back loop.
If you work inside out instead, with the wrong side facing you, and turn the figure right side out when it is done, it goes the other way. After turning, the front loop is the one on the outside, so that is the one to take.
If you are not sure which you do: picture the figure finished and turned the right way, and take the strand lying towards that side.
Why it disappears
The difference from a regular decrease is that you take one loop out of each stitch instead of the whole stitch. The top of the finished decrease comes out the same width as the stitches around it.
No gap opens either, because you never pulled the stitch tops apart. The decrease lies down among the other stitches instead of standing above them.
Hold the piece up to a lamp and the difference is easiest to see. The regular decrease glows. The invisible one does not.
Worth knowing
Work it at about the same tension as your other stitches. It comes out slightly tighter on its own, since you are only using half of each stitch, and pulling on top of that gives you a pucker instead of an even curve.
The back loop is easy to miss when the fabric is dense. Tip the figure away from you a little and the V opens up, bringing the far strand within reach.
Several invisible decreases in a row are fine. That is exactly how you close the top of a head or the end of an arm.
Something small to practise on
A figure with a round head is the best practice there is, because the decreases come thick and fast and you can see straight away whether they show.
The grumpy piglet has a round head. The rest of the figures are under amigurumi.
If single crochet is still new to you, start with the basic stitches.